

Pi-hole is an open-source, network-wide ad-blocking software. It blocks advertisements, trackers, and unwanted content across your entire home network by intercepting and filtering DNS requests before they reach ad-serving domains.
Unlike browser extensions that work only on individual devices or browsers, Pi-hole operates at the network level, protecting all connected devices— without requiring any software installed on them.
How It Works
- You set up Pi-hole on a device (typically a Raspberry Pi, but it can also run in Docker, a virtual machine, or other Linux systems).
- Configure your router (or individual devices) to use Pi-hole as the DNS server.
- When a device tries to load a webpage or app, it queries DNS for domain names (e.g., “ads.example.com”).
- Pi-hole checks against blocklists (millions of known ad/tracker domains) and returns a “null” response for blocked ones, preventing ads from loading.
- Legitimate requests pass through normally.
Key Benefits
- Blocks ads in apps and places where traditional blockers can’t reach.
- Improves privacy by stopping trackers.
- Reduces bandwidth usage and speeds up browsing (fewer ads to load).
- Provides a web dashboard for stats, query logs, and custom block/allow lists.
- It can also serve as a DHCP server if needed.
Step-by-Step Instructions:
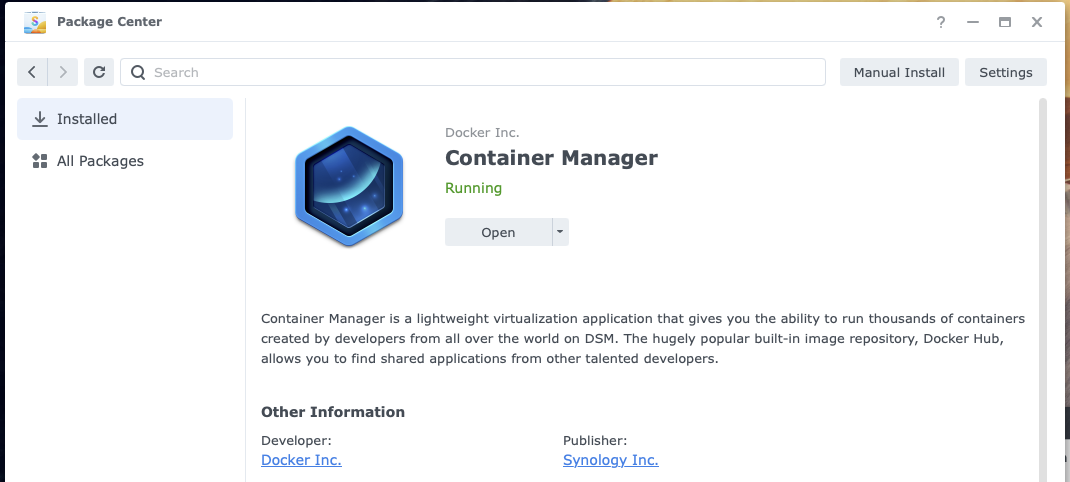
- Install the Container Manager on your Synology NAS. Developed by Docker and published by Synology.

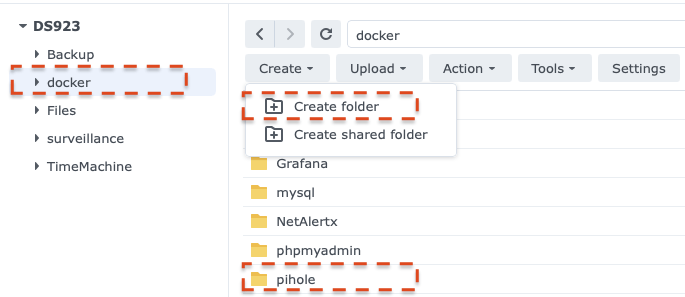
- Create a shared Docker folder for storing your Docker containers.
- Inside the Docker folder, create a new folder and name it pihole.
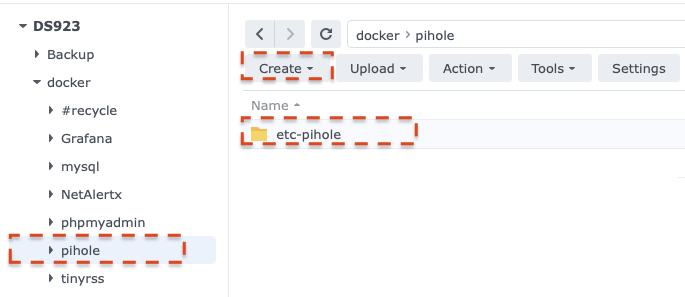
- Find the absolute path of the folder created in step 3 by viewing the properties of the folder.

- In the pihole folder, created in step 3, create a new folder named etc-pinhole. (make the folder name lowercase)
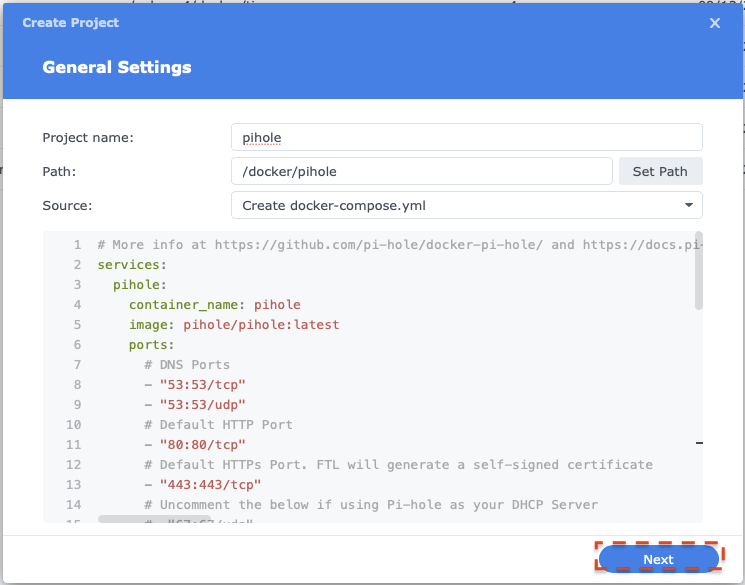
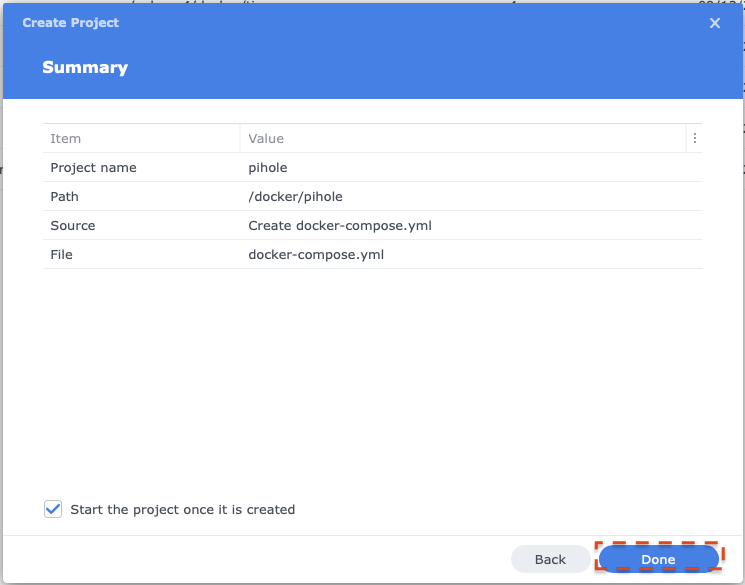
- In Container Manager, create a new project and name it pihole. Set the path to the pihole folder created in step 3, and select Create docker-compose.yaml as the source.
- Enter the following configuration information into the source box. Replace the volume paths with the path from step 4. The sample configuration shows /volume4/docker/pihole/ as an example; replace this with your path.
# More info at https://github.com/pi-hole/docker-pi-hole/ and https://docs.pi-hole.net/
services:
  pihole:
    container_name: pihole
    hostname: pihole
    image: pihole/pihole:latest
    ports:
      # DNS Ports
      - "53:53/tcp"
      - "53:53/udp"
      # Default HTTP Port
      - "8082:80/tcp"
      # Default HTTPs Port. FTL will generate a self-signed certificate
      #- "443:443/tcp"
      # Uncomment the below if using Pi-hole as your DHCP Server
      #- "67:67/udp"
      # Uncomment the line below if you are using Pi-hole as your NTP server
      #- "123:123/udp"
    environment:
      # Set the appropriate timezone for your location from
      # https://en.wikipedia.org/wiki/List_of_tz_database_time_zones, e.g:
      TZ: 'America/New_York'
      # Set a password to access the web interface. Not setting one will result in a random password being assigned
      FTLCONF_webserver_api_password: '<your_password>'
      # If using Docker's default `bridge` network setting the dns listening mode should be set to 'ALL'
      FTLCONF_dns_listeningMode: 'ALL'
    # Volumes store your data between container upgrades
    volumes:
      # For persisting Pi-hole's databases and common configuration file
      - /volume4/docker/pihole/etc-pihole:/etc/pihole
      # Uncomment the below if you have custom dnsmasq config files that you want to persist. Not needed for most starting fresh with Pi-hole v6. If you're upgrading from v5 you and have used this directory before, you should keep it enabled for the first v6 container start to allow for a complete migration. It can be removed afterwards. Needs environment variable FTLCONF_misc_etc_dnsmasq_d: 'true'
      #- './etc-dnsmasq.d:/etc/dnsmasq.d'
    #cap_add:
      # See https://github.com/pi-hole/docker-pi-hole#note-on-capabilities
      # Required if you are using Pi-hole as your DHCP server, else not needed
      # - NET_ADMIN
      # Required if you are using Pi-hole as your NTP client to be able to set the host's system time
      # - SYS_TIME
      # Optional, if Pi-hole should get some more processing time
      # - SYS_NICE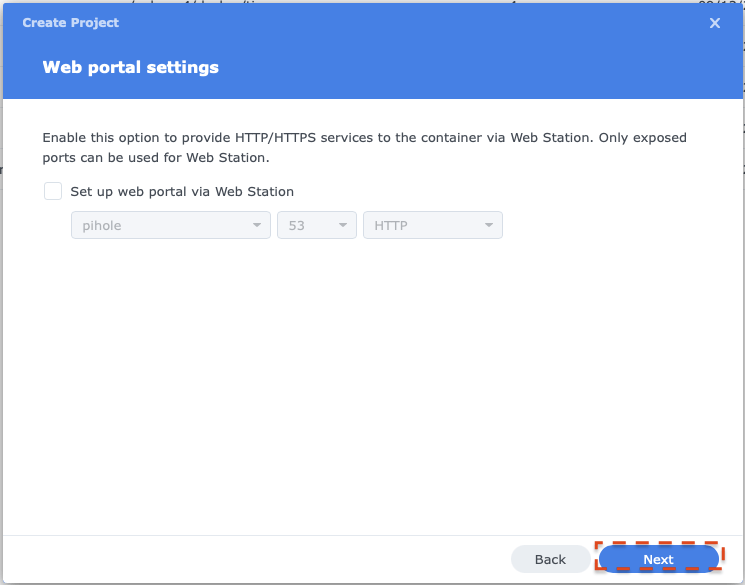
restart: unless-stopped - Click Next
- Click Next
- Click Done to start the installation.
- Once installation is complete, access your Pi-hole installation through the host address of your Synology NAS, port 8082 (specified in the compose YAML).
Note: There are many configuration options that can be specified in the compose.yaml file. Refer to https://docs.pi-hole.net/docker/ for more information.