
As of this writing, Microsoft has a published schedule of two major annual updates of their Dynamics 365 Business Central ERP software product. These updates, referred to as “Waves,” are released in April and October. Approximately one month before the “Major Release,” Microsoft makes a “Public Preview” available to the public.
How do you access a Preview Environment (version) once its availability is announced?
You can access a “Public Preview” version of Dynamics 365 Business Central in two ways.
The first way to access the environment is to create a Sandbox Environment through the Dynamics 365 Business Central admin center.
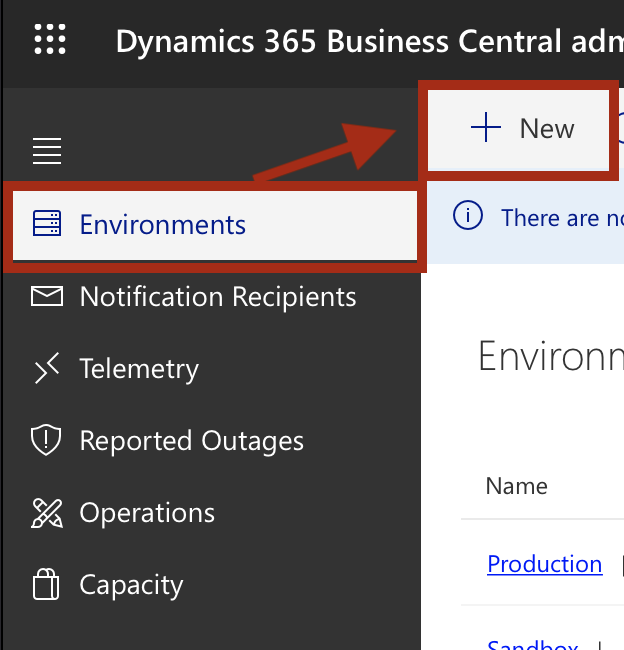
- Login to your Dynamics 365 Business Central admin center
- Select the Environments option
- Select + New to create a new Environment

- Enter a unique Environment Name in the Create Environment page
- Choose the Sandbox for the Type
- Select the desired Country
- Select the version labeled as Preview from the Version drop down list
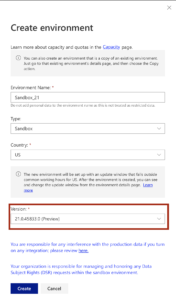
- Click the Create button

The second option to access the environment is to create a Preview Docker Container using PowerShell.
- Install the BCContainerHelper Module if not installed.
- Create a new BC Container using the Preview Container artifacts. The following is an example script, which you should adjust for your environment and options.
 ############################################################################################################

$containername = 'Preview'
$UserName = 'admin'
$Password = 'password'
$SecurePassword = ConvertTo-SecureString $Password -AsPlainText -Force
$Credential = New-Object System.Management.Automation.PSCredential ($UserName,$SecurePassword)

############################################################################################################

$artifactUrl = Get-BCArtifactUrl  -country "us" -select Latest -type Sandbox -storageAccount BcPublicPreview

New-BCContainer  `
    -accept_eula `
    -containerName $containername `
    -auth NavUserPassword `
    -artifactUrl $artifactUrl `
    -accept_outdated `
    -Verbose `
    -updateHosts `
    -alwayspull `
    -includeAL `
    -Credential $Credential `
    -isolation hyperv
How do you access a Preview Development Environment ?
- Create a Preview Docker Container
- Open Visual Studio Code and open the Extension Page
- Select the ellipsis in the Extension menu and choose the “Install from VSIX…” menu option
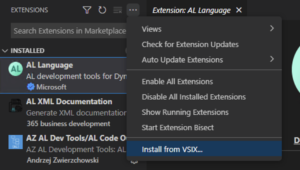
- Browse for the ALLanguage.vsix file
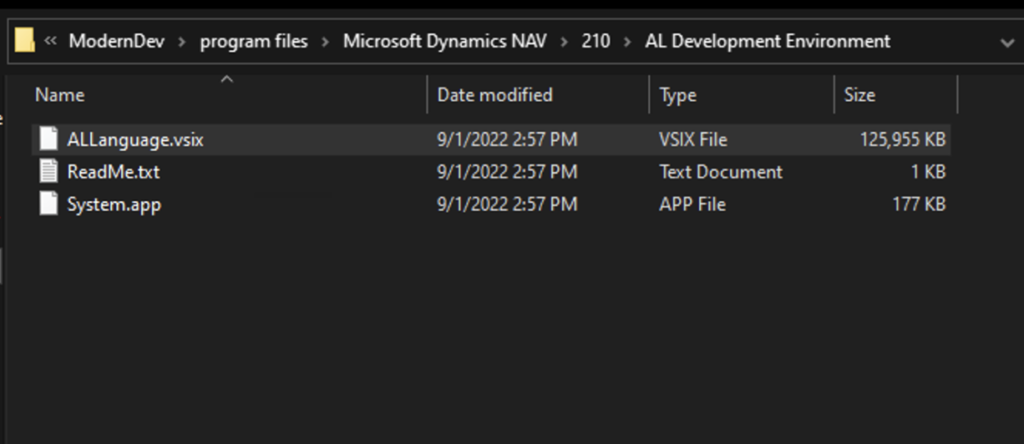 Note: The AL Language extension file is located in the ModernDev folder of the installation media for the Preview Docker Container. The Preview AL Language Extension may also be retrieved using the Get-AlLanguageExtensionFromArtifacts cmdlet. Example:
$artifactUrl = Get-BCArtifactUrl -country "us" -select Latest -type Sandbox -storageAccount BcPublicPreview

Get-AlLanguageExtensionFromArtifacts -artifactUrl $artifactUrl - Click Install
- Reload to Refresh the AL Language Extension


Read more on how to prepare for major updates with preview environments here.
Note: The code and information discussed in this article is for informational and demonstration purposes only. This content was created referencing Microsoft Dynamics 365 Business Central Public Preview 2022 Wave 2
1 ping
[…] While you’re here take a quick read of Dynamics 365 Business Central: Setup a Public Preview Development Environment […]