
 As users enter data through normal business processing, a byproduct of data migrations or consolidations, there are often instances where there is more than one master record for a customer, vendor, or contact.
Having multiple references to the same entity can be challenging to manage their orders, invoices, payments, and interactions. In earlier versions of Business Central, this presented challenges. I was excited to see the Application update for merging customers, vendors, and contacts listed on the April 2019 release notes for Microsoft Dynamics 365 Business Central. Before the feature to merge customers, vendors, and contacts within Business Central, I had been asked countless times over the years to provide an option for the merge. Fast forward, and the feature is still valuable and improved.
To merge customers (the same process is followed for vendors and contracts):
- Search for “Customers” using the “Tell Me” action in the App Bar and click the “Customers” list link.
- Select the Customer that is as a duplicate and open the “Customer Card”.
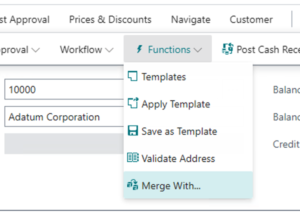
- Select the Actions-> Functions -> Merge from the action bar.
- Enter the Customer No. of the customer that you would like to merge with the selected Customer.
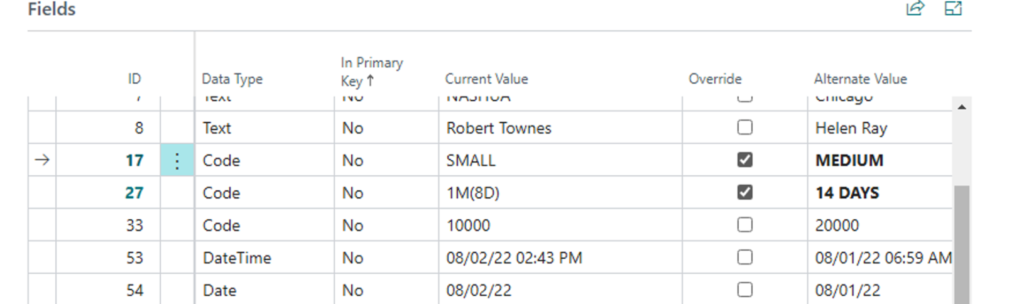
- After to select the Customer to merge, the Fields FastTab will list the fields that are different. For each of the fields that you would like to use the value on from the “Merge” With customer, select the Override checkbox.
- After you select the fields to Override, Select the Merge action from the action bar
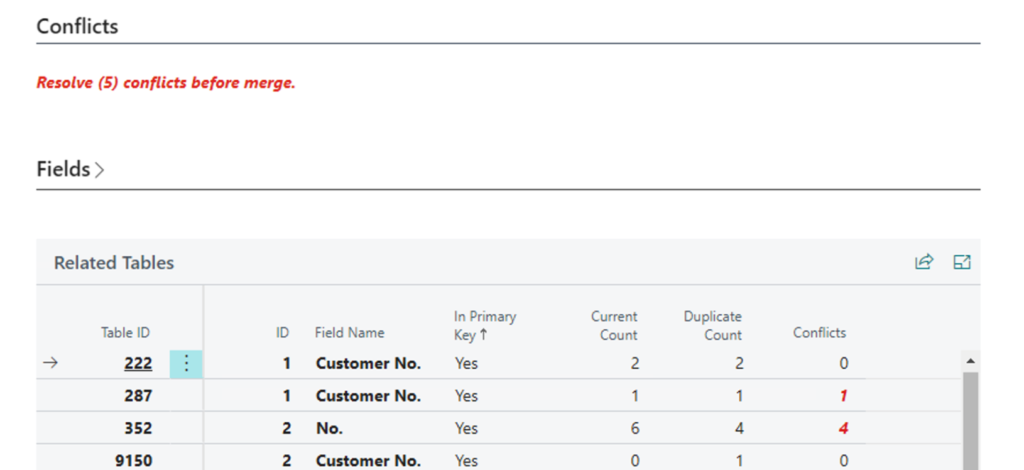
- The Related Tables FastTab displays the where there is a field relation for the two records and lists the conflict count. If there are conflicts, you will need to resolve them before completing the merge.
- Select the Conflicts and the Merge Duplicate Conflicts page will display.
- Select the Conflict, then Select the “View Details” action to open the Merge Duplicate page and see the details of the Conflict
- If you do not wish to keep the Duplicate record, select the “Remove Duplicate” action.
- If you wish to keep the Duplicate, change the value in the “Alternate Value” field for the conflict and select the “Rename Duplicate” action. Similar to the Merge action you can choose the field values to override during the rename.
- Repeat steps 9-11 until all of the conflicts have been resolved
- On the “Merge Duplicate” Page select the Merge action again and click Yes to complete the merge.


It is important to note that once you complete a merge, it cannot be undone.
For more information visit Merge Duplicate Records
Note: The code and information discussed in this article is for informational and demonstration purposes only. This content was created referencing Microsoft Dynamics 365 Business Central 2022 Wave 1