
One feature of Microsoft Dynamics 365 Business Central is the scheduling of Reports. Schedule Reports are saved to a file or printed to a specific printer. Similar to other scheduled tasks, scheduled reports are processed through the job queue and scheduled to execute once or on a recurring interval. Scheduling reports is an excellent way to offload tasks from the users and minimize any impacts of executing the report while users are active in the application.
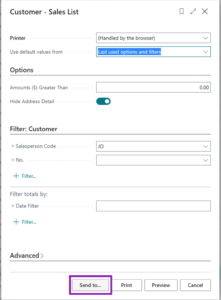
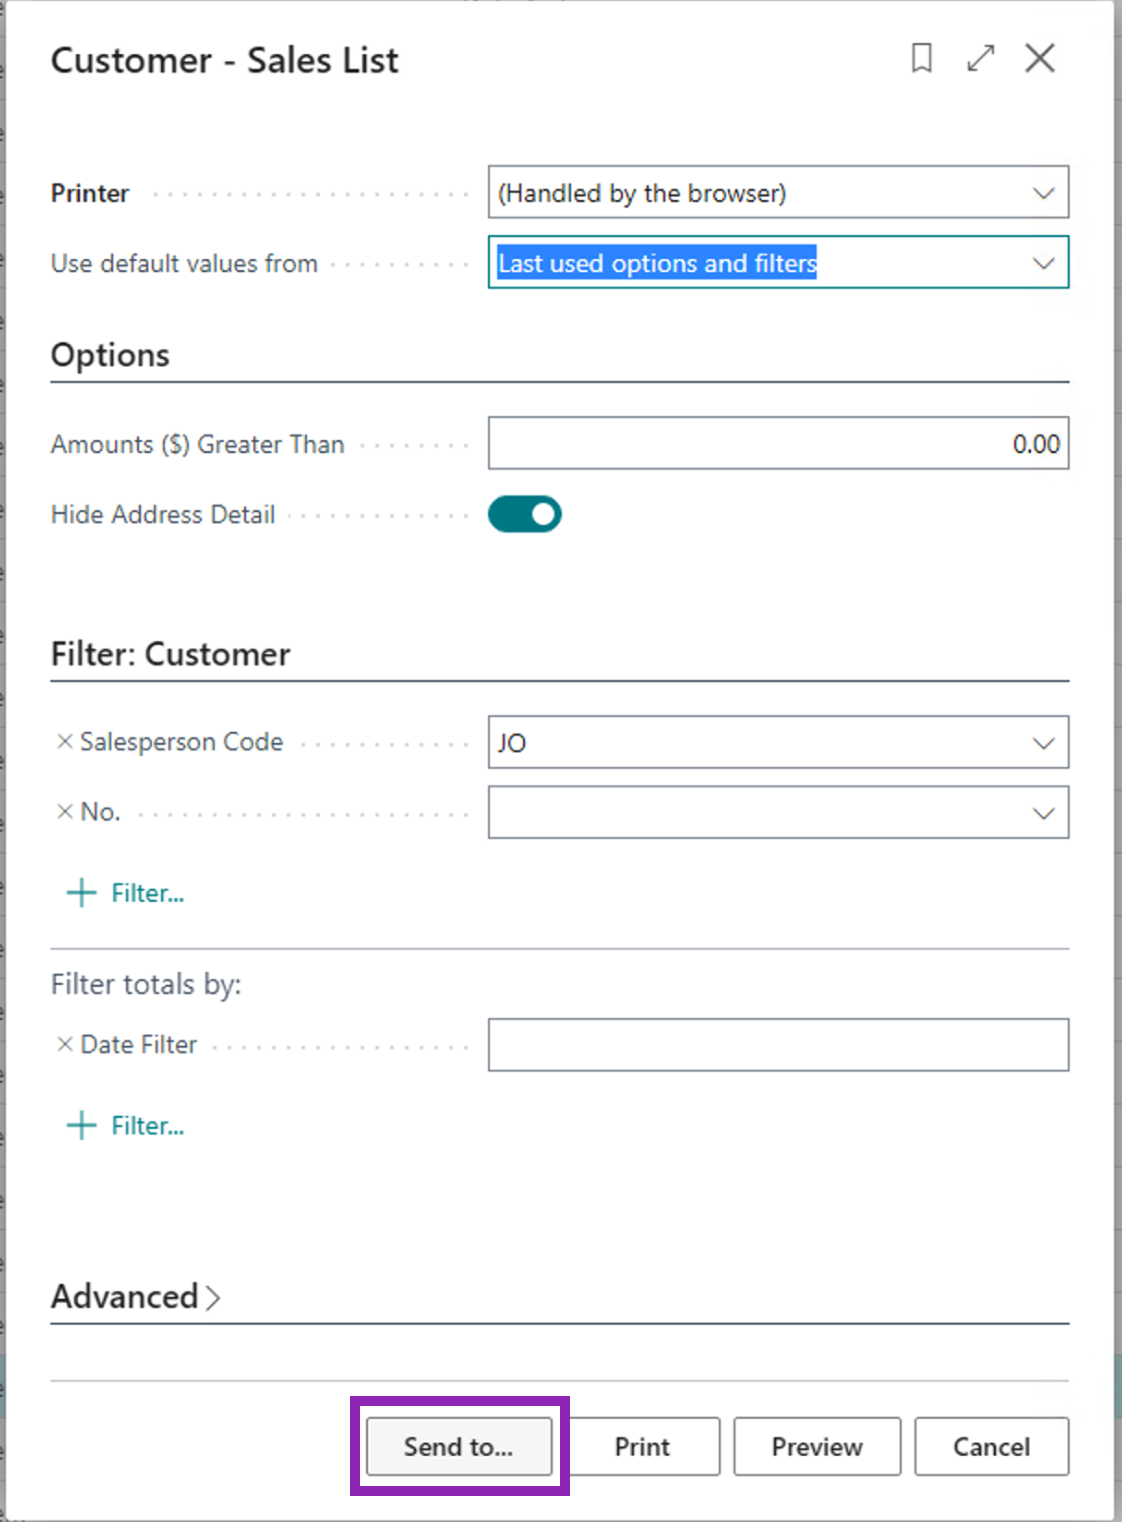
Schedule a report with the Schedule option, found on the options page, after clicking the “Send To…” button on the Report’s Request Page. When scheduling a report, the Report’s Request Page options entered are applied when the scheduled report job executes.
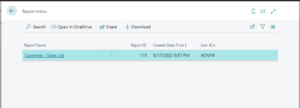
If you save the report to a file, it will appear in the Report Inbox, where it can be viewed or saved in another location. A printed report will print to the selected printer. A report scheduled to run once will be removed from the job queue after execution, whereas recurring jobs will move to the next scheduled interval.
- Enter the desired options on the Report’s Request Page and click the “Send To…” button
- Select the Schedule option and click Ok to open the scheduling options dialog
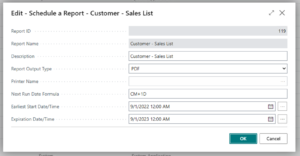
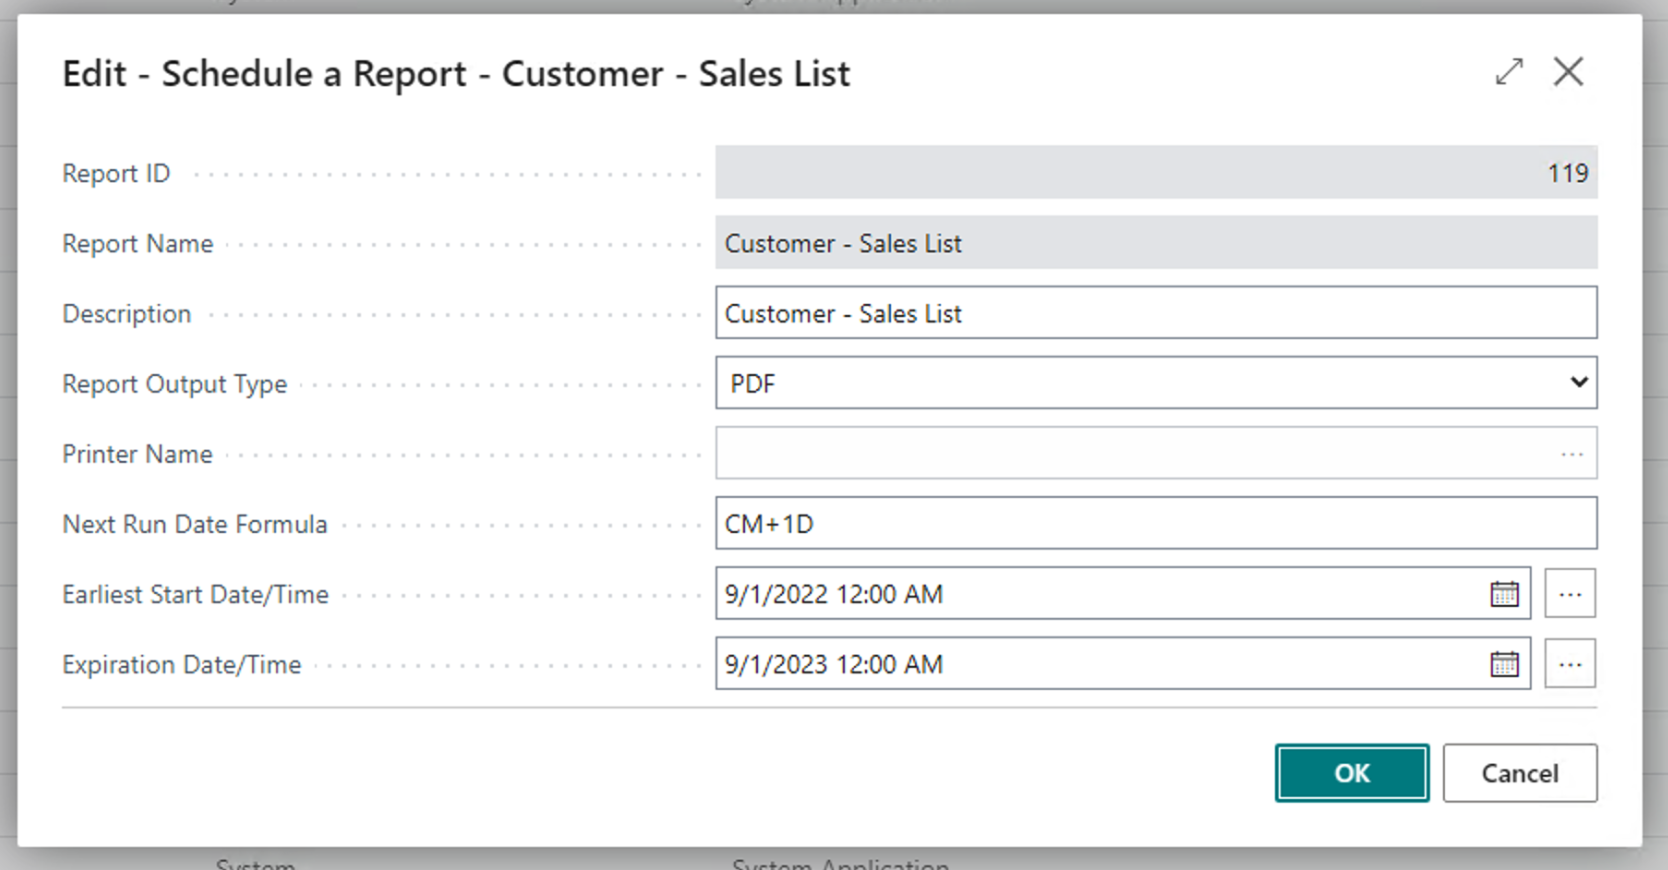
- Enter the report scheduling options.
– Select the Report Output Type; If the report output is printed enter the Printer Name, if the output type is a file, it will appear in the Report Inbox
– If the report is a recurring report, enter the date formula to use for calculating the Report’s next Start Date/Time.
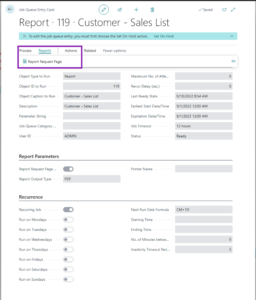
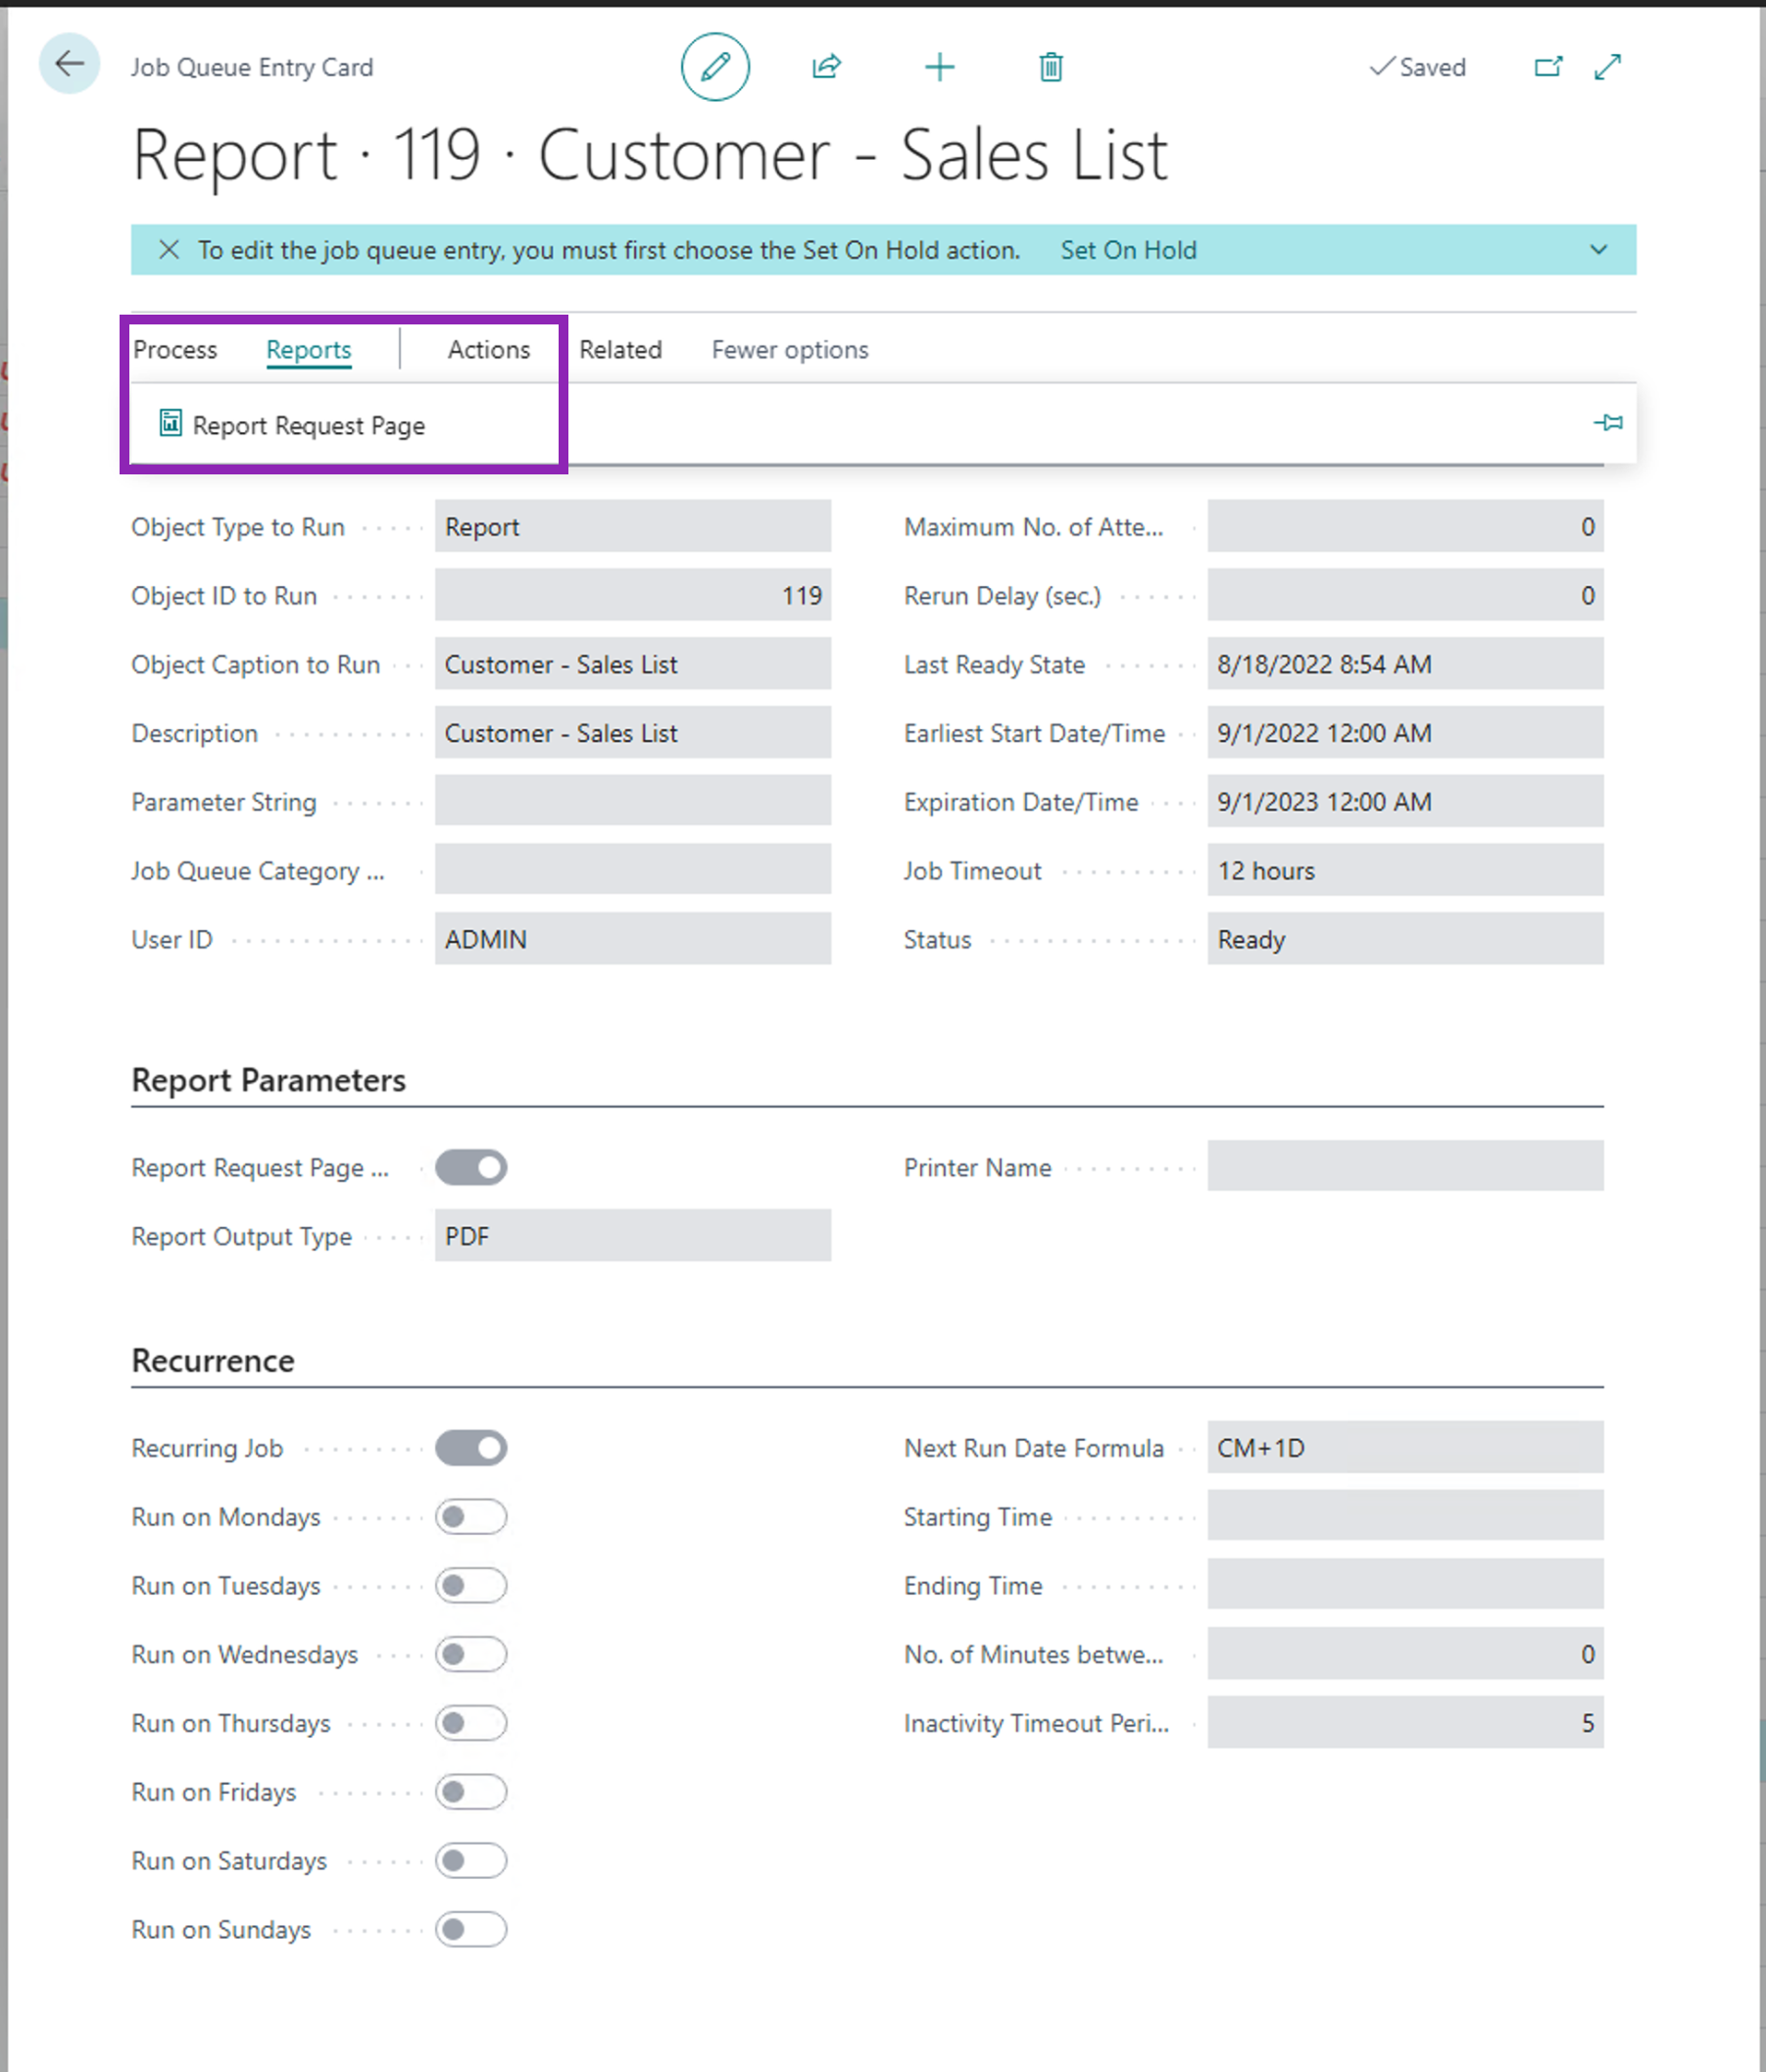
– Select when the Earliest Date/Time the report will execute, and if the report is a recurring report you can optionally add an Expiration Date/Time. - Once scheduled, a Job Queue Entry is created. If changes are needed to the report or schedule, they are done on the Job Queue Entry. The Report Options are accessible with the “Report Request Page” action and the output adjusted in the Report Parameters Fast Tab. The standard Job Queue options control the report execution schedule.
- Reports that are output to a file appear in the Report Inbox. Search for “Report In Box” using the “Tell Me” action in the App Bar and click the “Report Inbox” Lists link

I will discuss how a developer can control the Schedule option of a report in a future post.
Note: The code and information discussed in this article is for informational and demonstration purposes only. This content was created referencing Microsoft Dynamics 365 Business Central 2022 Wave 1
2 pings
[…] Dynamics 365 Business Central: Schedule Reports […]
[…] great feature of Microsoft Dynamics 365 Business Central is the option to schedule Reports. As beneficial as this feature may be, there may be cases where the opportunity to schedule a […]