
Highlighting posts and resources from the Business Central development community — February 22–28, 2026
Looking to stay current with Dynamics 365 Business Central AL development? Here’s a curated list of recent blog posts, tutorials, and community resources from the past week.
Recent Posts (February 22–28, 2026)
➡️ 1. BC Online Wait Statistics in Telemetry: The AI Boost
📇 Author: Duilio Tacconi
🗓️ Date: February 23, 2026
🌎 Link: duiliotacconi.com
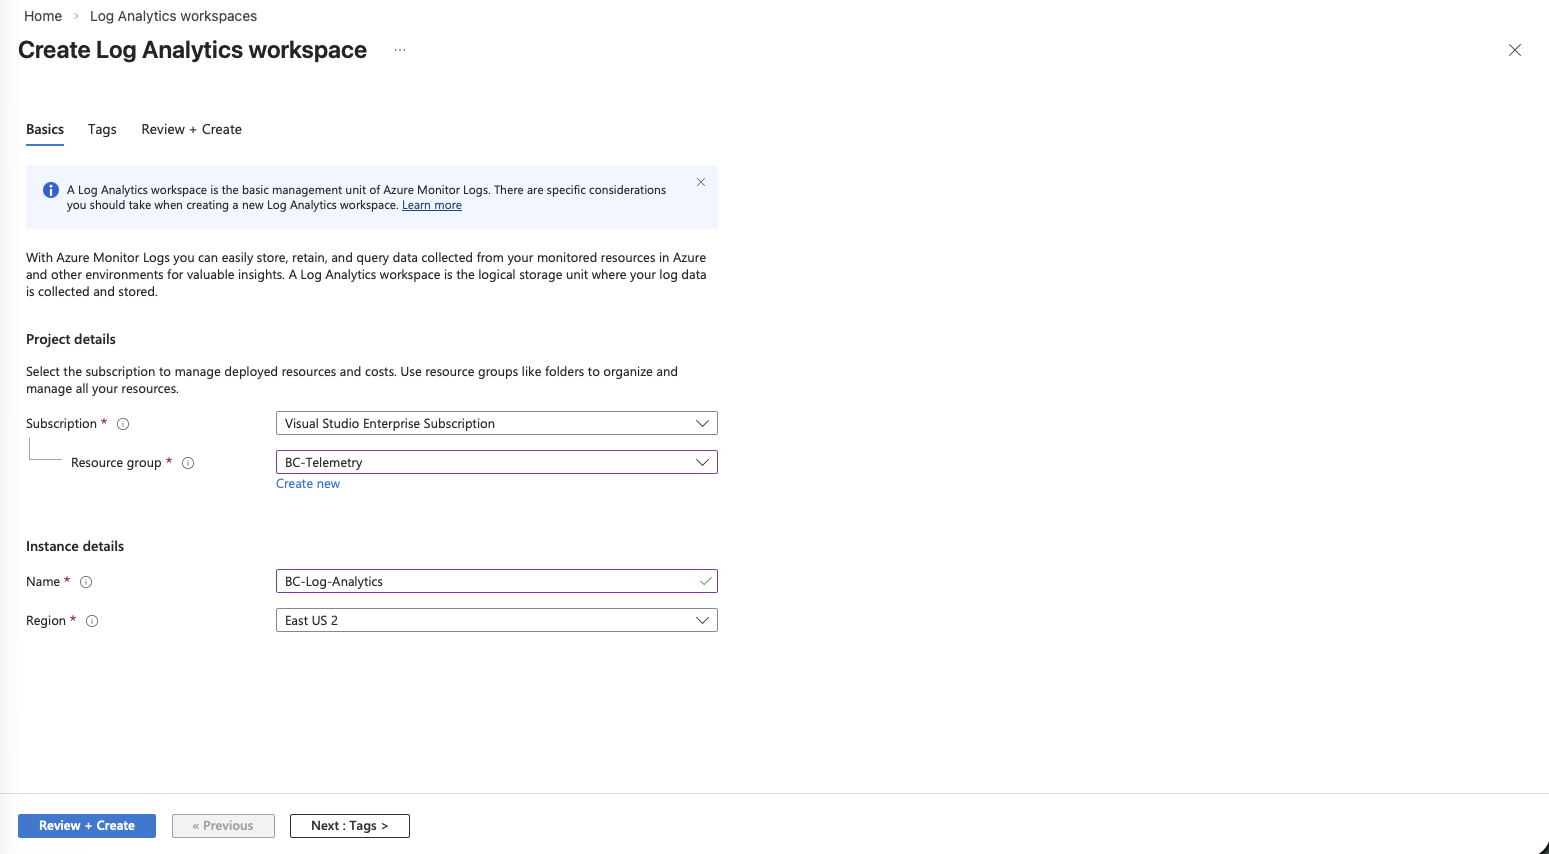
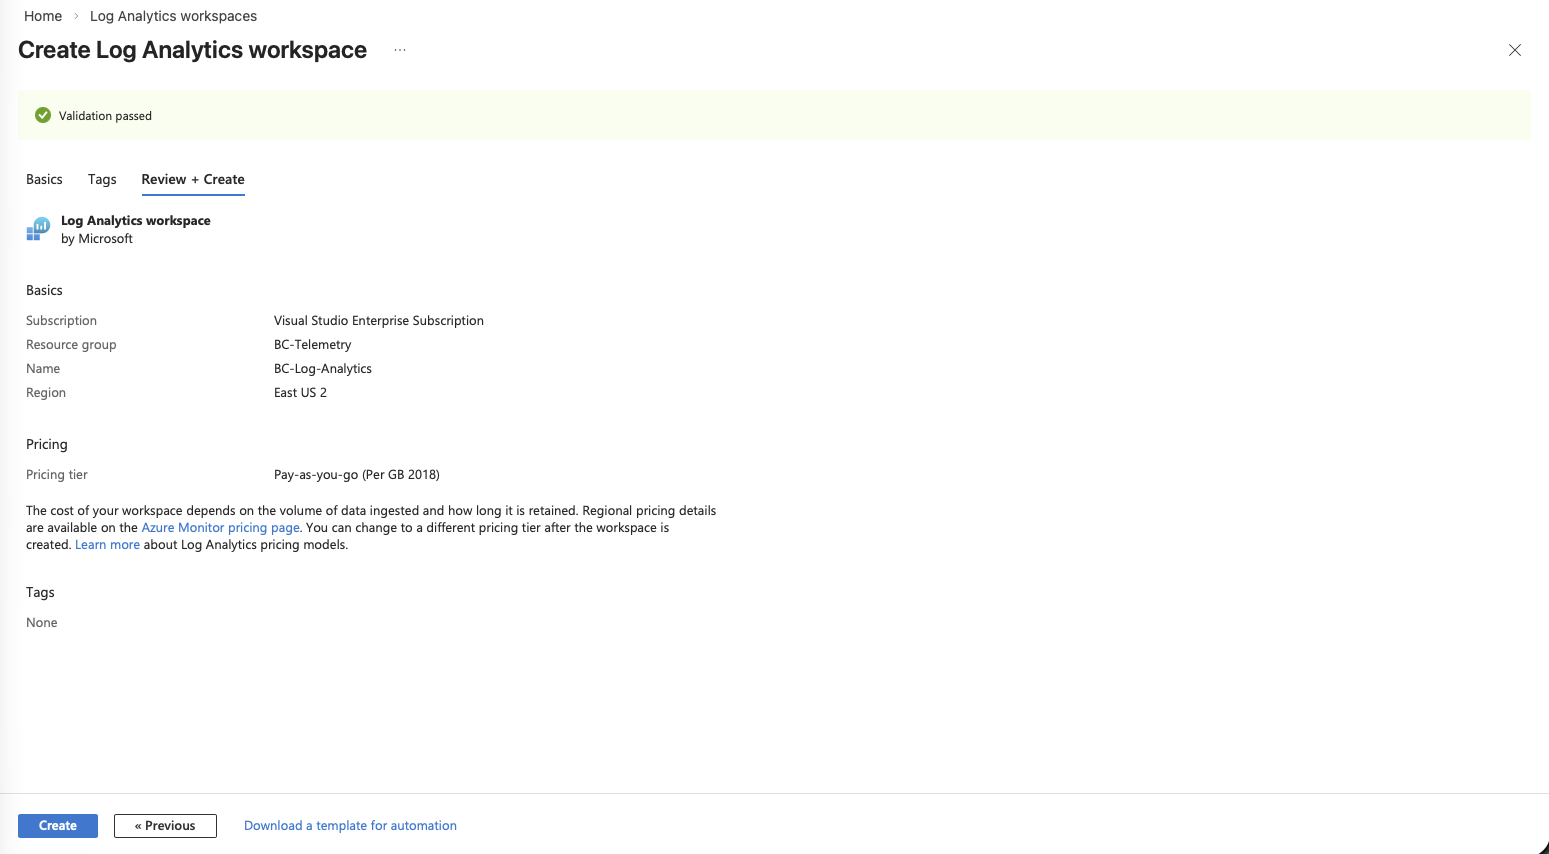
📝 Summary: Duilio does a deep technical exploration of wait statistics in Business Central Online telemetry — from the underlying DMV query that collects the data, through KQL delta analysis during a BCPT load test that surfaced lock contention as 46% of total wait time, to feeding the results to AI for automated interpretation. The post includes practical T-SQL and KQL examples, plus a downloadable AI-generated analysis document showing how GitHub Copilot with Claude can turn raw telemetry into actionable performance insights.
➡️ 2. AL Performance Bootcamp: Level Up Your Code — BCTechDays 2026 Workshop
📇 Author: Stefan Šošić
🗓️ Date: February 23, 2026
🌎 Link: ssosic.com
📝 Summary: Stefan announces his upcoming BCTechDays 2026 workshop focused on AL performance optimization. The hands-on session promises practical techniques for identifying and resolving performance bottlenecks in Business Central AL code — a timely complement to the growing community interest in BC performance tooling, telemetry analysis, and background processing patterns.
➡️ 3. Troubleshooting Series – Ep5 – Telemetry
📇 Author: Waldo
🗓️ Date: February 24, 2026
🌎 Link: waldo.be
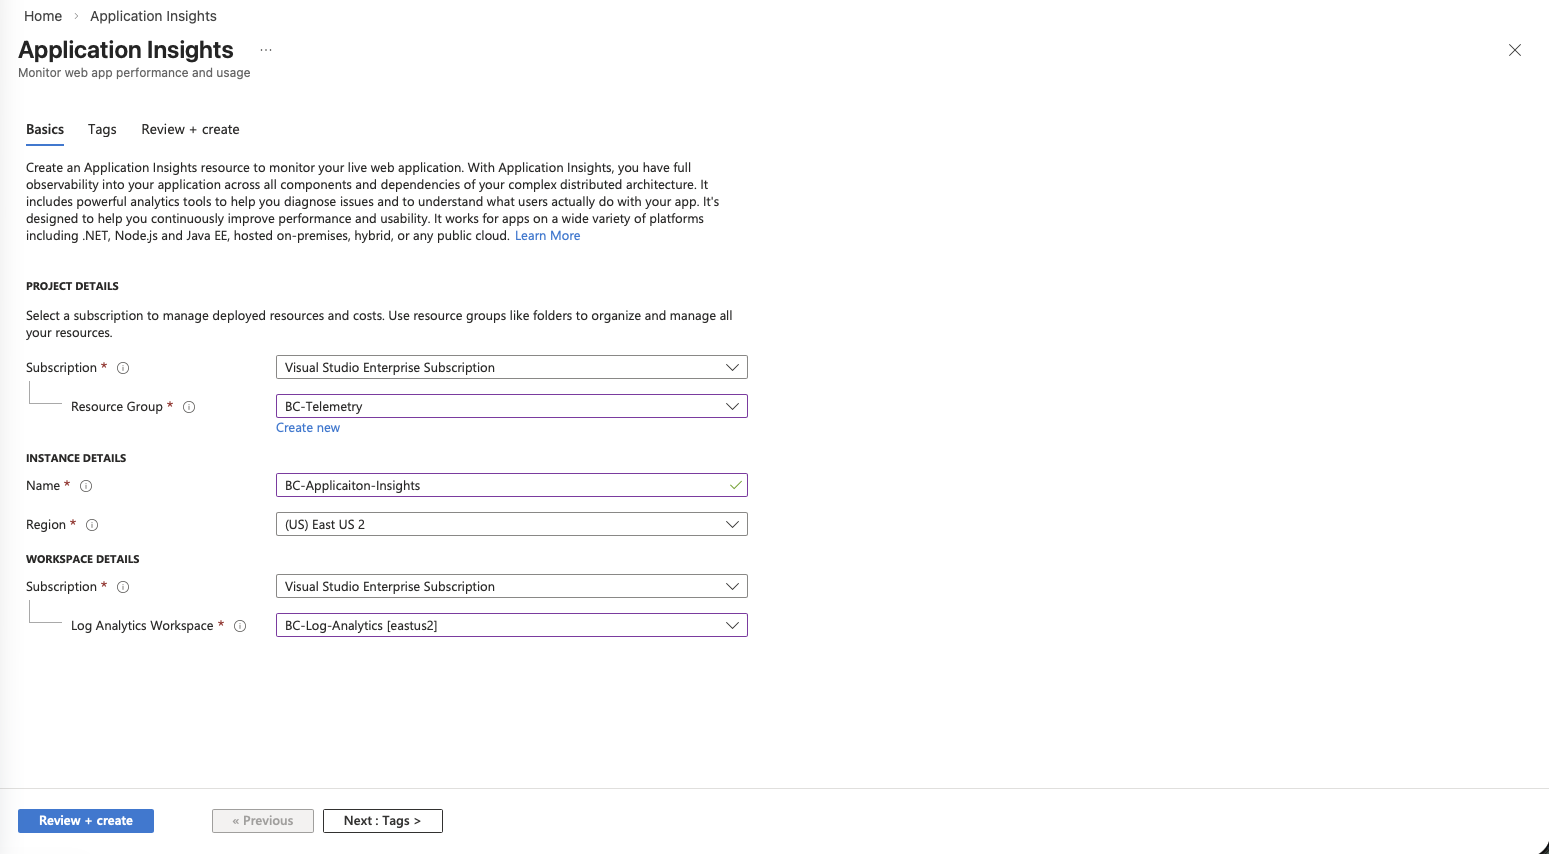
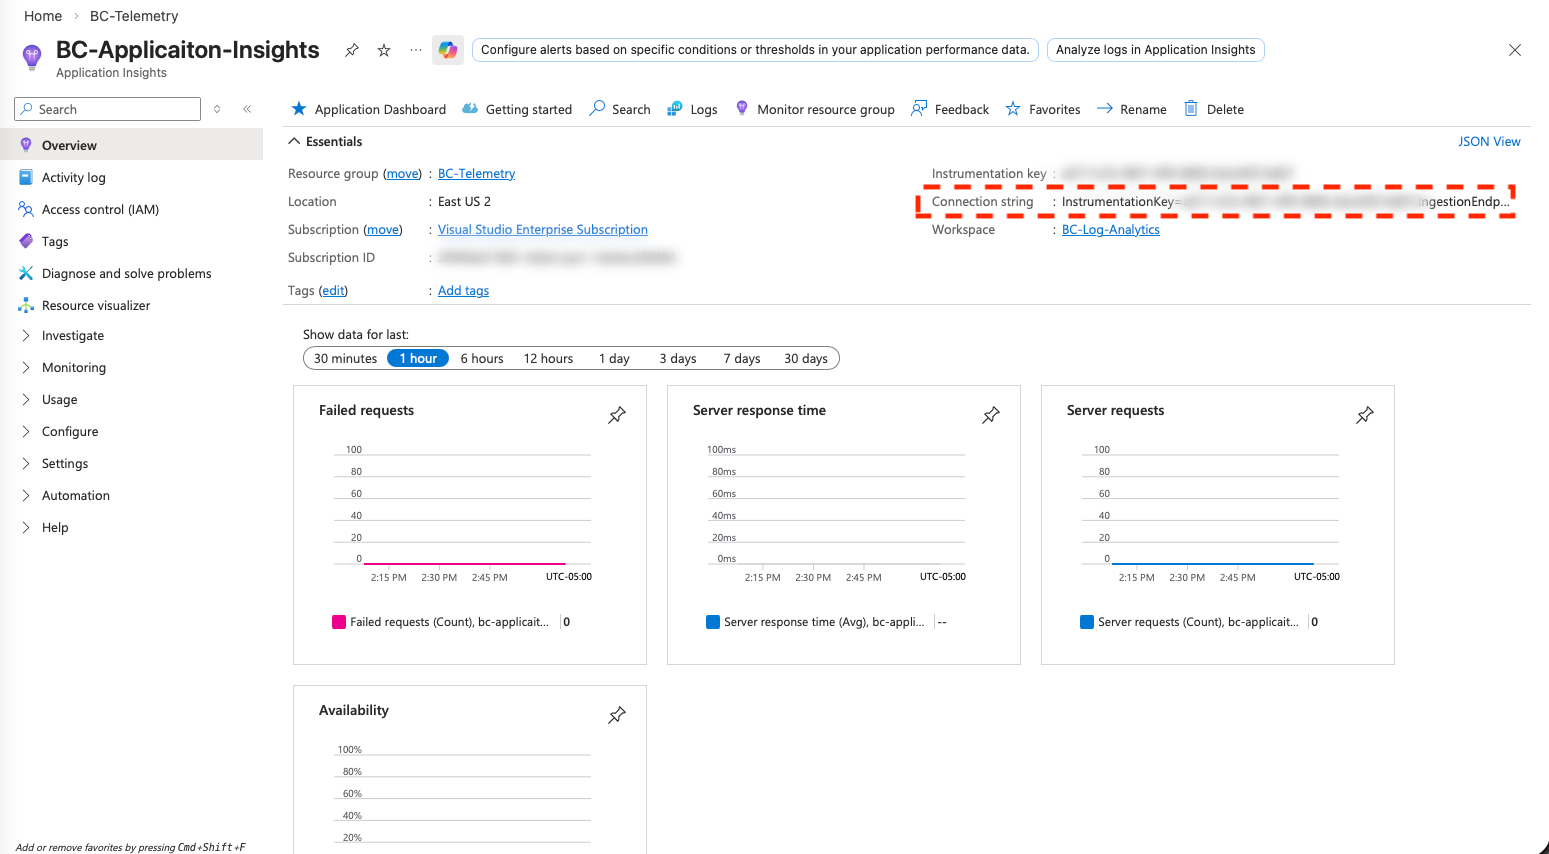
📝 Summary: Waldo dedicates episode 5 of his troubleshooting series to Business Central telemetry — covering the two telemetry channels (environment-level and app/extension-level), Microsoft’s built-in tooling (Power BI apps, BCTech repo KQL queries, the 15-minute “Enable Additional Logging” SQL profiler), and his own BC Telemetry Buddy MCP tool. The post traces his telemetry journey from Azure Data Explorer dashboards through AI-assisted querying, with practical guidance on getting started without needing to become a KQL expert.
➡️ 4. If You Can’t Make It Fast, Make It Feel Fast
📇 Author: Stefan Maron
🌎 Link: stefanmaron.com
📝 Summary: Stefan and Henrik Helgesen walk through Business Central’s four background processing tools — Page Background Tasks, StartSession, TaskScheduler, and Job Queue — anchored by a real-world case study from a medical device manufacturer where moving production planning to a Job Queue pattern eliminated deadlocks and delivered instant user feedback. The post also covers how BC Online’s auto-scaling distributes TaskScheduler and Job Queue work across server instances, with a comparison table showing when to reach for each tool.
➡️ 5. ALCops: The Next Chapter of LinterCop
📇 Author: Arthur van der Voort
🗓️ Date: February 23, 2026
🌎 Link: vondervoort.be
📝 Summary: Arthur shares the story behind ALCops from the maintainer’s perspective — born from a conversation with Stefan Maron about LinterCop’s future, the project was rebuilt from scratch to allow breaking changes without disrupting existing pipelines. The current v0.5.0 release has ~95% of LinterCop rules migrated, a VS Code extension, and AL-Go support, with Azure DevOps integration and AI tooling exploration (including a potential ALCops MCP server) still on the roadmap. BusinessCentral.LinterCop will be set to read-only in the coming months.
➡️ 6. Learn AL with Claude — Interactive Business Central Development Course
📇 Author: Silviu Virlan
🗓️ Date: February 24, 2026
🌎 Link: svirlan.com
📝 Summary: Silviu introduces an interactive AL development course powered by Claude Code — 13 lesson scripts that run inside VS Code using a marker system (STOP, USER, ACTION) to create an adaptive teaching flow. The course follows a continuous scenario where you build an Equipment Rental Management extension for a fictional outdoor equipment company, covering tables, pages, enums, codeunits, reports, and permission sets across two modules.
➡️ 7. A Practical Guide to Creating Agents in Business Central with AI Development Toolkit (Preview)
📇 Author: Javi Armesto
🗓️ Date: February 26, 2026
🌎 Link: techspheredynamics.com
📝 Summary: Javi presents a comprehensive 5-phase framework for building Business Central agents using the AI Development Toolkit preview — covering identity and metadata, the AL skeleton (IAgentFactory, IAgentMetadata, IAgentTaskExecution), natural language instructions with official toolkit keywords like MEMORIZE and Reply, security layering through permissions, profiles, and page customizations, and ConfigurationDialog setup. The post also explores proactive task creation via event subscribers and the Agent Task Builder fluent API, all anchored by a working HR Absence Agent example.
➡️ 8. Why API Templates Don’t Work on Business Central Custom API Pages
📇 Author: Mohana
🗓️ Date: February 28, 2026
🌎 Link: mohana-dynamicsnav.blogspot.com
📝 Summary: Mohana digs into why API templates silently fail on custom API pages — the standard ProcessNewRecordFromAPI trigger relies on TempFieldSet tracking to apply template values, but custom fields aren’t tracked in the same way. The post walks through the underlying system behavior with code references and demonstrates how to make API templates work correctly with custom API pages.
Recent Videos (February 22–28, 2026)
🎬 1. What Is New: Business Central Agent Instruction History
📺 Channel: Microsoft Dynamics 365 Business Central
🗓️ Date: February 27, 2026
🌎 Link: youtube.com
📝 Summary: A walkthrough of the new instruction history feature for Business Central agents — covering how to save specific versions of agent instructions, browse and restore previous versions, and export them to disk. Part of the “Design and coding agents in Business Central” playlist.
🎬 2. What Is New: Understanding Copilot Credit Consumptions for Your Business Central Agent
📺 Channel: Microsoft Dynamics 365 Business Central
🗓️ Date: February 27, 2026
🌎 Link: youtube.com
📝 Summary: A guide to monitoring and analyzing Copilot credit consumption for Business Central agents — showing how to get an overview of credit usage per task and per agent for a given time period. Part of the “Design and coding agents in Business Central” playlist.
🎬 3. What Is New: Coding Business Central Agents with AI Development Toolkit
📺 Channel: Microsoft Dynamics 365 Business Central
🗓️ Date: February 27, 2026
🌎 Link: youtube.com
📝 Summary: Demonstrates how to create agents you can distribute via AL applications — defining your own agent type, configuring it properly, and integrating it with Business Central business processes using the AI Development Toolkit. Part of the “Design and coding agents in Business Central” playlist.
🎬 4. What Is New: Troubleshooting Business Central Agents
📺 Channel: Microsoft Dynamics 365 Business Central
🗓️ Date: February 27, 2026
🌎 Link: youtube.com
📝 Summary: Shows how to unblock agents when they get stuck with an assigned task, covering practical troubleshooting steps for Business Central agents. Part of the “Design and coding agents in Business Central” playlist.
🎬 5. What Is New: Exporting and Importing Agent in Business Central
📺 Channel: Microsoft Dynamics 365 Business Central
🗓️ Date: February 27, 2026
🌎 Link: youtube.com
📝 Summary: Walks through exporting and importing agents in Business Central during the design phase — useful for moving agent configurations between environments or sharing them across teams. Part of the “Design and coding agents in Business Central” playlist.
🎬 6. Working with Instructions for Agents in Business Central
📺 Channel: Microsoft Dynamics 365 Business Central
🗓️ Date: February 27, 2026
🌎 Link: youtube.com
📝 Summary: Covers best strategies for writing agent instructions, running tasks, and testing the available instructions and tools. The second part of the video explains the specific tools that agents can use. Part of the “Design and coding agents in Business Central” playlist.
🎬 7. Sales Validation Sample Agent for Business Central
📺 Channel: Microsoft Dynamics 365 Business Central
🗓️ Date: February 27, 2026
🌎 Link: youtube.com
📝 Summary: Shows how to use sample agents in Business Central for inspiration and examples when building your own. The demo walks through the Sales Validation agent, illustrating how sample agents can serve as a starting point for custom development. Part of the “Design and coding agents in Business Central” playlist.
🎬 8. How to Create Agents in Business Central
📺 Channel: Microsoft Dynamics 365 Business Central
🗓️ Date: February 27, 2026
🌎 Link: youtube.com
📝 Summary: A getting-started guide to defining custom agents in Business Central — the demo walks through a quick end-to-end process of creating and running an agent within Business Central. Part of the “Design and coding agents in Business Central” playlist.
🎬 9. Introducing: Envision, Design and Code Business Central Agents
📺 Channel: Microsoft Dynamics 365 Business Central
🗓️ Date: February 27, 2026
🌎 Link: youtube.com
📝 Summary: An introductory overview of how to envision, design, and code powerful Business Central agents — setting the stage for the rest of the “Design and coding agents in Business Central” playlist.
Community Resources
Official Resources
GitHub Repositories
- microsoft/BCApps – Repository for collaboration on Microsoft Dynamics 365 Business Central applications.
- microsoft/BCTech – Business Central technology samples.
- microsoft/ALAppExtensions – Repository for collaboration on Microsoft AL application add-on and localization extensions for Microsoft Dynamics 365 Business Central.
- microsoft/AL – Home of the Dynamics 365 Business Central AL Language extension for Visual Studio Code.
- StefanMaron/MSDyn365BC.Code.History – Contains the Microsoft Business Central Code. Updated each month.
Follow on Social Media
- Twitter/X Hashtags: #MSDyn365BC | #BusinessCentral
Stay Connected
The Business Central AL development community stays active with valuable content on AL development, upgrades, integrations, and tooling improvements. Following #MSDyn365BC and #BusinessCentral on Twitter/X is a great way to catch new posts as they’re published.
Note: This review is compiled from publicly available blog posts and community resources. Links to external blog posts are provided for your information only and do not constitute endorsement or validation of their content. Publication information and availability are subject to change. Always verify information against official documentation for production use.

 available.