If you’ve worked with integrations in Business Central, chances are you’ve had to deal with XML at some point. In a previous post I covered how to create an XML file in AL. This time we’ll go the other direction—reading and parsing an XML document using the built-in XML data types in AL.
We’ll work through a realistic example: reading a multi-level XML file that contains a sales order header with one or more sales lines.
You can find the full code for the example on GitHub.
The XML Data Types You Need to Know
AL ships with a set of XML data types purpose-built for reading and writing XML. For parsing an XML document you’ll primarily use these:
- XmlDocument – represents the entire XML document. This is your entry point.
- XmlElement – represents a single element (tag) in the document.
- XmlNode – a more general type that can be an element, attribute, text, etc. You’ll often cast nodes to elements.
- XmlNodeList – a collection of child nodes returned by methods like
GetChildNodes() or GetChildElements().
- XmlAttribute – represents an attribute on an element (e.g.,
currency="USD").
- XmlDeclaration – represents the
<?xml ...?> declaration at the top of the document.
- XmlNamespaceManager – manages namespace lookups when your XML uses namespaces.
For most parsing tasks, XmlDocument, XmlElement, XmlNode, and XmlNodeList are all you need.
The Sample XML
Here’s the XML we’ll parse. It represents a sales order with a header and two lines:
<?xml version="1.0" encoding="utf-8"?>
<SalesOrder>
  <Header>
    <OrderNo>SO-1001</OrderNo>
    <CustomerNo>C-10000</CustomerNo>
    <OrderDate>2026-03-01</OrderDate>
    <Currency>USD</Currency>
  </Header>
  <Lines>
    <Line>
      <LineNo>10000</LineNo>
      <ItemNo>ITEM-1000</ItemNo>
      <Description>Widget A</Description>
      <Quantity>5</Quantity>
      <UnitPrice>12.50</UnitPrice>
    </Line>
    <Line>
      <LineNo>20000</LineNo>
      <ItemNo>ITEM-2000</ItemNo>
      <Description>Widget B</Description>
      <Quantity>3</Quantity>
      <UnitPrice>25.00</UnitPrice>
    </Line>
  </Lines>
</SalesOrder>
This is a typical multi-level structure: a root <SalesOrder> element wrapping a single <Header> and a <Lines> collection containing multiple <Line> children.
Loading the XML Document
The first step is getting the XML text into an XmlDocument. You can load it from a text variable, an InStream, or from a BLOB field—whatever your source happens to be. Here’s the most common pattern using XmlDocument.ReadFrom():
procedure ReadSalesOrderXml(XmlText: Text)
var
    XmlDoc: XmlDocument;
begin
    if not XmlDocument.ReadFrom(XmlText, XmlDoc) then
        Error('Failed to parse XML document.');

    ProcessSalesOrder(XmlDoc);
end;
ReadFrom() returns true if the XML was well-formed and parsed successfully, which makes it easy to handle malformed input up front. You can also load from an InStream:
procedure ReadSalesOrderFromStream(XmlStream: InStream)
var
    XmlDoc: XmlDocument;
begin
    XmlDocument.ReadFrom(XmlStream, XmlDoc);
    ProcessSalesOrder(XmlDoc);
end;
Navigating to the Root Element
Once you have an XmlDocument, grab the root element with GetRoot():
procedure ProcessSalesOrder(XmlDoc: XmlDocument)
var
    RootElement: XmlElement;
begin
    XmlDoc.GetRoot(RootElement);

    // RootElement is now <SalesOrder>
    ReadHeader(RootElement);
    ReadLines(RootElement);
end;
From the root element you can drill into child elements by name using SelectSingleNode() or by iterating with GetChildElements().
Reading the Header
To pull values from the <Header> element, use SelectSingleNode() to locate the header, then grab each child element’s inner text:
procedure ReadHeader(RootElement: XmlElement)
var
    HeaderNode: XmlNode;
    HeaderElement: XmlElement;
    OrderNo: Code[20];
    CustomerNo: Code[20];
    OrderDate: Date;
    Currency: Code[10];
begin
    if not RootElement.SelectSingleNode('Header', HeaderNode) then
        Error('Header element not found.');

    HeaderElement := HeaderNode.AsXmlElement();

    OrderNo := CopyStr(GetElementValue(HeaderElement, 'OrderNo'), 1, MaxStrLen(OrderNo));
    CustomerNo := CopyStr(GetElementValue(HeaderElement, 'CustomerNo'), 1, MaxStrLen(CustomerNo));
    Evaluate(OrderDate, GetElementValue(HeaderElement, 'OrderDate'));
    Currency := CopyStr(GetElementValue(HeaderElement, 'Currency'), 1, MaxStrLen(Currency));

    Message('Order: %1, Customer: %2, Date: %3, Currency: %4',
        OrderNo, CustomerNo, OrderDate, Currency);
end;
A SelectSingleNode() call returns true and populates the node variable if a match is found, so you can check whether the node exists before using it. Once you have the node, convert it to an XmlElement with AsXmlElement() so you can work with element-specific methods.
A Handy Helper: GetElementValue
You’ll find yourself reading inner text from child elements constantly, so a small helper keeps things clean:
procedure GetElementValue(ParentElement: XmlElement; ChildName: Text) ReturnValue: Text
var
    ChildNode: XmlNode;
begin
    if ParentElement.SelectSingleNode(ChildName, ChildNode) then
        ReturnValue := ChildNode.AsXmlElement().InnerText();
end;
This returns the text content of a named child element, or an empty string if the element isn’t found. Adjust this to throw an error or return a default depending on whether the element is required in your scenario.
Reading the Lines
Here’s where the multi-level structure comes in. The <Lines> element contains multiple <Line> children, so we need to iterate:
procedure ReadLines(RootElement: XmlElement)
var
    LinesNode: XmlNode;
    LinesElement: XmlElement;
    LineNodeList: XmlNodeList;
    LineNode: XmlNode;
    LineElement: XmlElement;
    LineNo: Integer;
    ItemNo: Code[20];
    Description: Text[100];
    Quantity: Decimal;
    UnitPrice: Decimal;
begin
    if not RootElement.SelectSingleNode('Lines', LinesNode) then
        Error('Lines element not found.');

    LinesElement := LinesNode.AsXmlElement();
    LineNodeList := LinesElement.GetChildElements('Line');

    foreach LineNode in LineNodeList do begin
        LineElement := LineNode.AsXmlElement();

        Evaluate(LineNo, GetElementValue(LineElement, 'LineNo'));
        ItemNo := CopyStr(GetElementValue(LineElement, 'ItemNo'), 1, MaxStrLen(ItemNo));
        Description := CopyStr(GetElementValue(LineElement, 'Description'), 1, MaxStrLen(Description));
        Evaluate(Quantity, GetElementValue(LineElement, 'Quantity'));
        Evaluate(UnitPrice, GetElementValue(LineElement, 'UnitPrice'));

        Message('Line %1: Item %2 (%3) - Qty %4 @ %5',
            LineNo, ItemNo, Description, Quantity, UnitPrice);
    end;
end;
Key points:
GetChildElements('Line') returns an XmlNodeList containing only the <Line> child elements.- The
foreach loop walks each <Line> node.
- We convert each node to an
XmlElement and then use the same GetElementValue helper to pull values.
Dynamically Reading Child Elements
If you don’t know the child element names ahead of time, you can iterate all children of a node:
local procedure ReadHeader(RootElement: XmlElement; var OutputLines: List of [Text])
var
HeaderNode: XmlNode;
HeaderElement: XmlElement;
ChildNodes: XmlNodeList;
ChildNode: XmlNode;
ChildElement: XmlElement;
begin
if not RootElement.SelectSingleNode('Header', HeaderNode) then
Error('Header element not found.');
HeaderElement := HeaderNode.AsXmlElement();
ChildNodes := HeaderElement.GetChildElements();
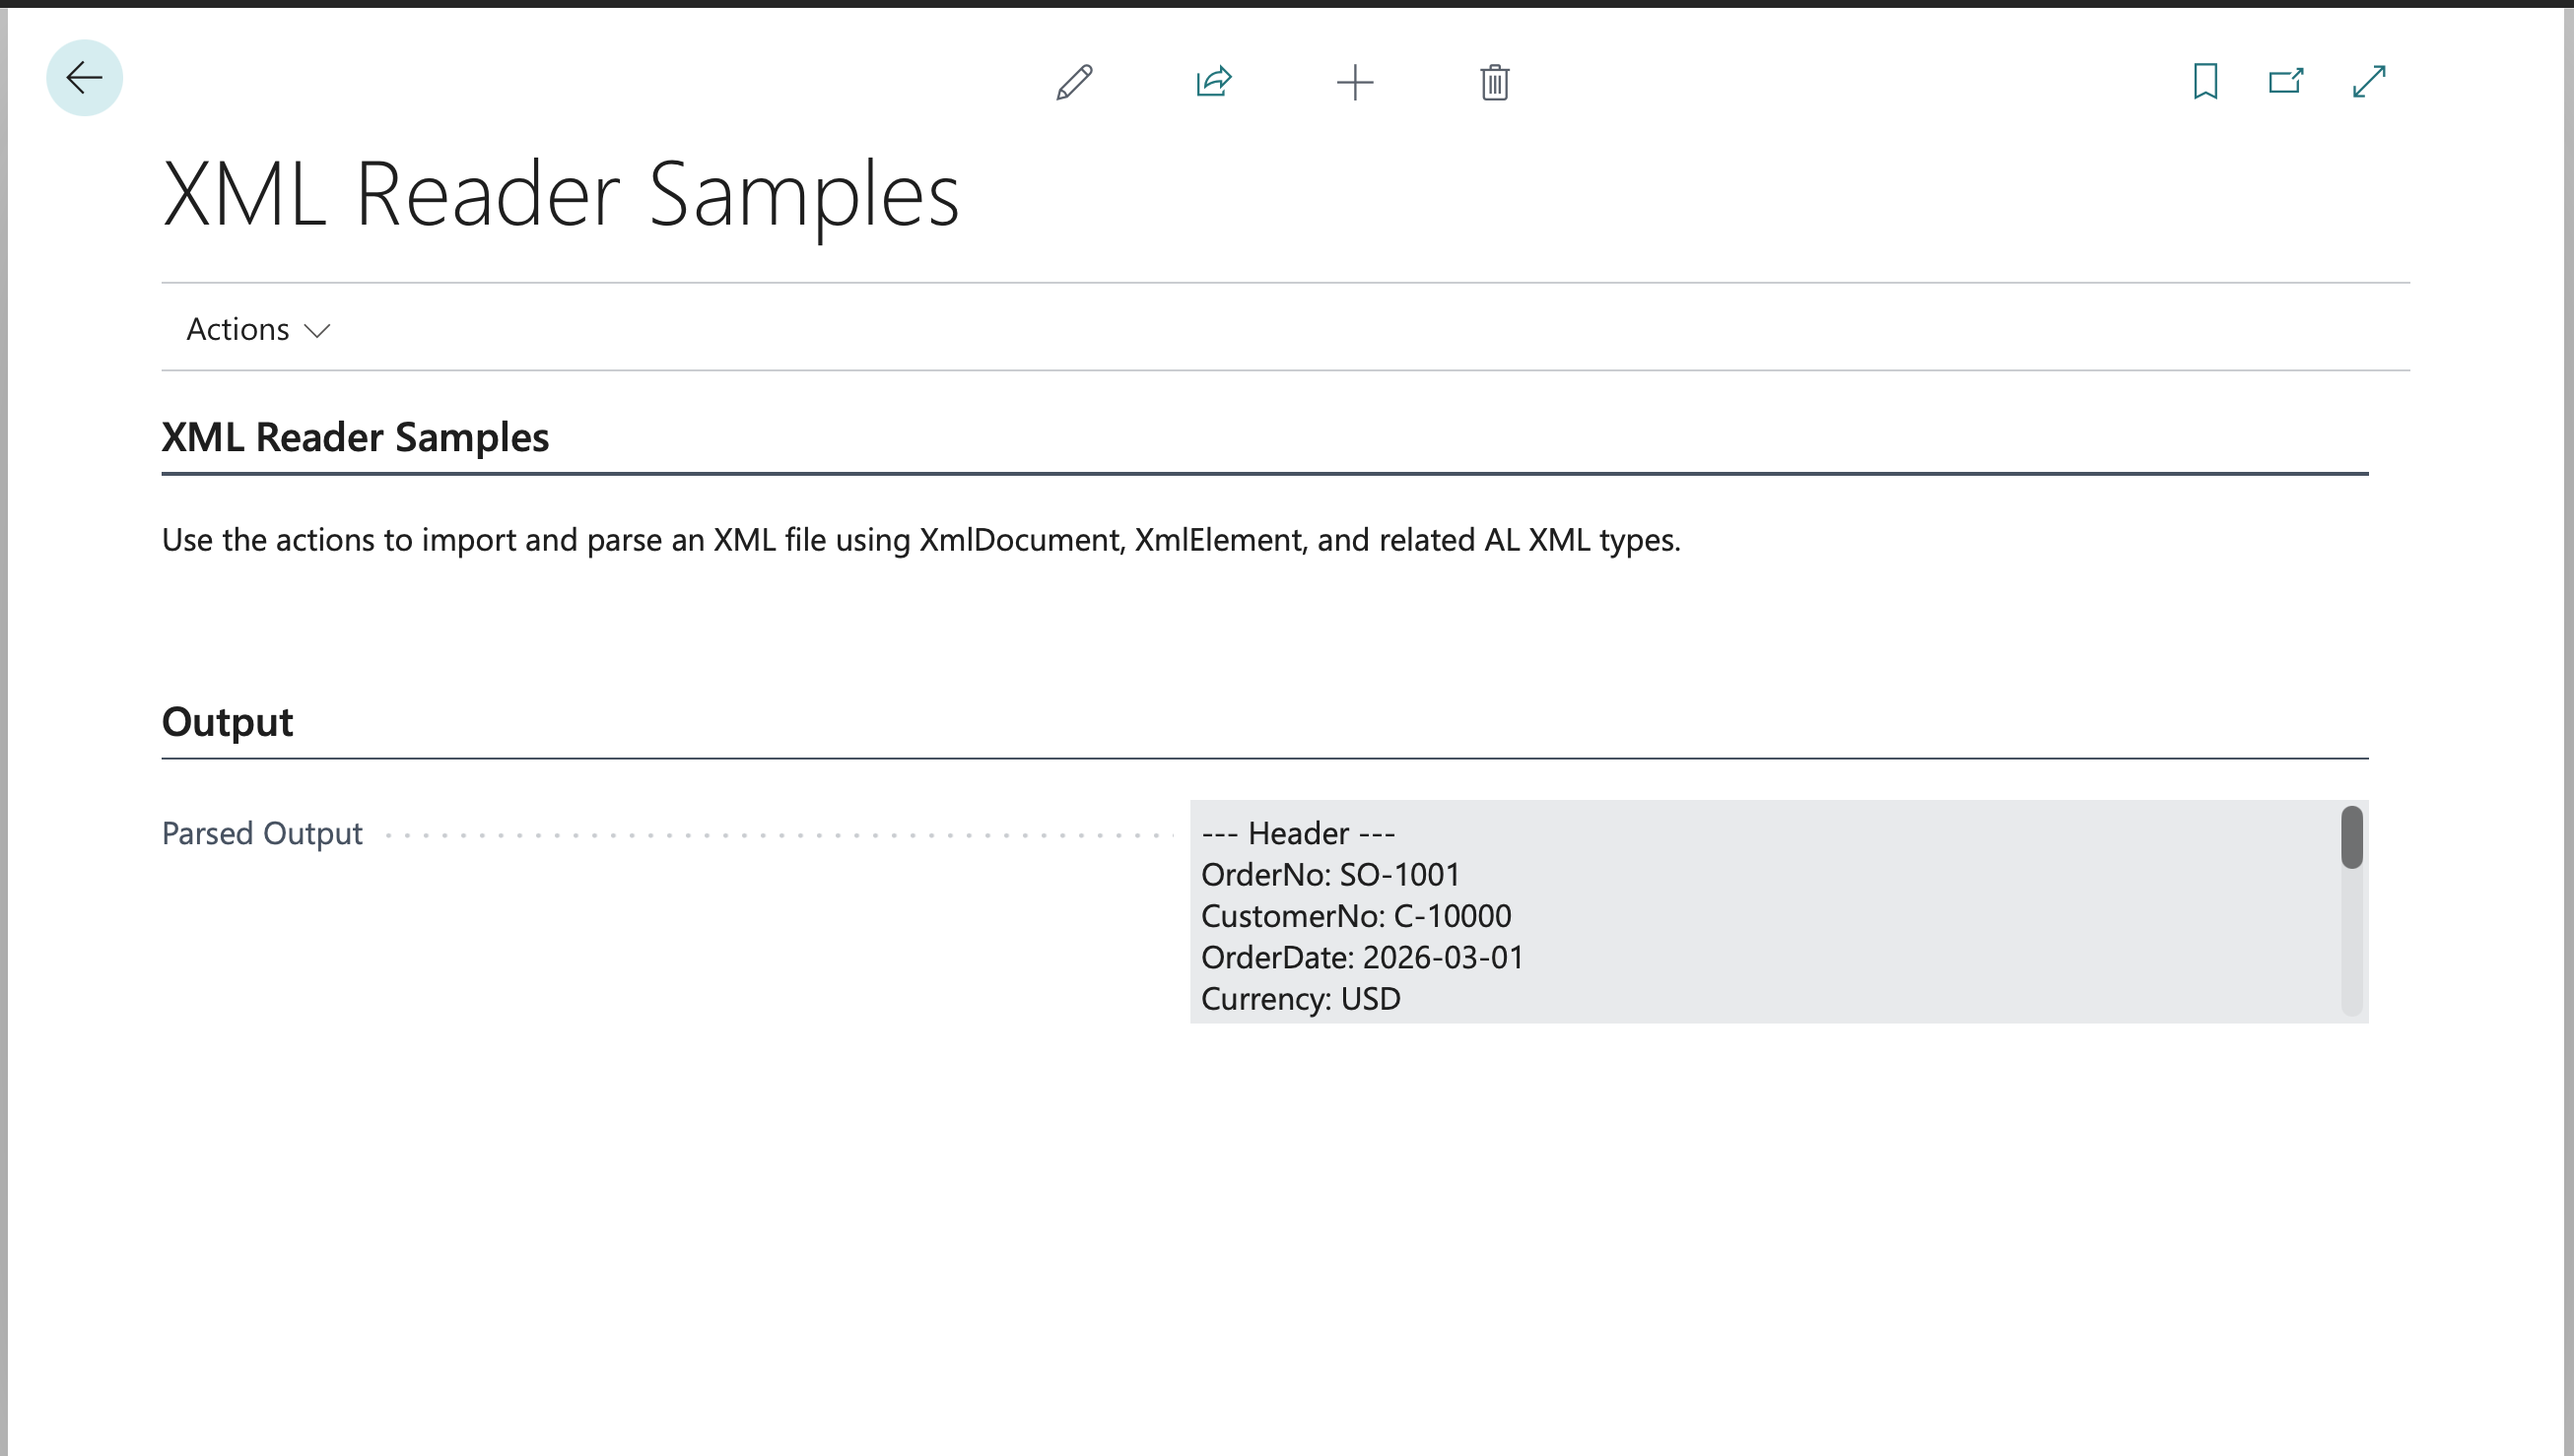
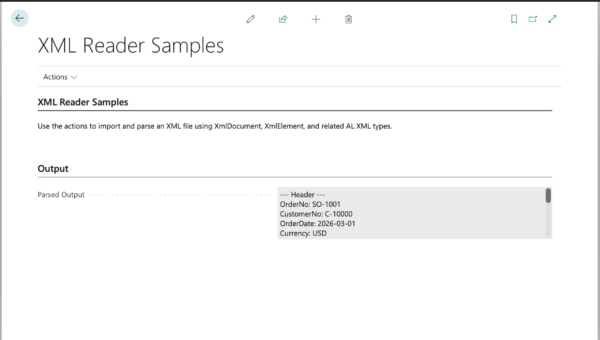
OutputLines.Add('--- Header ---');
foreach ChildNode in ChildNodes do begin
ChildElement := ChildNode.AsXmlElement();
OutputLines.Add(ChildElement.Name() + ': ' + ChildElement.InnerText());
end;
end;
local procedure ReadLines(RootElement: XmlElement; var OutputLines: List of [Text])
var
LinesNode: XmlNode;
LinesElement: XmlElement;
LineNodeList: XmlNodeList;
LineNode: XmlNode;
LineElement: XmlElement;
ChildNodes: XmlNodeList;
ChildNode: XmlNode;
ChildElement: XmlElement;
begin
if not RootElement.SelectSingleNode('Lines', LinesNode) then
Error('Lines element not found.');
LinesElement := LinesNode.AsXmlElement();
LineNodeList := LinesElement.GetChildElements('Line');
foreach LineNode in LineNodeList do begin
LineElement := LineNode.AsXmlElement();
ChildNodes := LineElement.GetChildElements();
OutputLines.Add('--- Line ---');
foreach ChildNode in ChildNodes do begin
ChildElement := ChildNode.AsXmlElement();
OutputLines.Add(ChildElement.Name() + ': ' + ChildElement.InnerText());
end;
end;
end;
Putting It All Together
Here’s the full Codeunit so you can see how all the pieces connect:
Codeunit 50100 "Read Sales Order XML"
{
    procedure ReadSalesOrderXml(XmlText: Text)
    var
        XmlDoc: XmlDocument;
    begin
        if not XmlDocument.ReadFrom(XmlText, XmlDoc) then
            Error('Failed to parse XML document.');

        ProcessSalesOrder(XmlDoc);
    end;

    local procedure ProcessSalesOrder(XmlDoc: XmlDocument)
    var
        RootElement: XmlElement;
    begin
        XmlDoc.GetRoot(RootElement);
        ReadHeader(RootElement);
        ReadLines(RootElement);
    end;

    local procedure ReadHeader(RootElement: XmlElement)
    var
        HeaderNode: XmlNode;
        HeaderElement: XmlElement;
        OrderNo: Code[20];
        CustomerNo: Code[20];
        OrderDate: Date;
        Currency: Code[10];
    begin
        if not RootElement.SelectSingleNode('Header', HeaderNode) then
            Error('Header element not found.');

        HeaderElement := HeaderNode.AsXmlElement();

        OrderNo := CopyStr(GetElementValue(HeaderElement, 'OrderNo'), 1, MaxStrLen(OrderNo));
        CustomerNo := CopyStr(GetElementValue(HeaderElement, 'CustomerNo'), 1, MaxStrLen(CustomerNo));
        Evaluate(OrderDate, GetElementValue(HeaderElement, 'OrderDate'));
        Currency := CopyStr(GetElementValue(HeaderElement, 'Currency'), 1, MaxStrLen(Currency));

        Message('Order: %1, Customer: %2, Date: %3, Currency: %4',
            OrderNo, CustomerNo, OrderDate, Currency);
    end;

    local procedure ReadLines(RootElement: XmlElement)
    var
        LinesNode: XmlNode;
        LinesElement: XmlElement;
        LineNodeList: XmlNodeList;
        LineNode: XmlNode;
        LineElement: XmlElement;
        LineNo: Integer;
        ItemNo: Code[20];
        Description: Text[100];
        Quantity: Decimal;
        UnitPrice: Decimal;
    begin
        if not RootElement.SelectSingleNode('Lines', LinesNode) then
            Error('Lines element not found.');

        LinesElement := LinesNode.AsXmlElement();
        LineNodeList := LinesElement.GetChildElements('Line');

        foreach LineNode in LineNodeList do begin
            LineElement := LineNode.AsXmlElement();

            Evaluate(LineNo, GetElementValue(LineElement, 'LineNo'));
            ItemNo := CopyStr(GetElementValue(LineElement, 'ItemNo'), 1, MaxStrLen(ItemNo));
            Description := CopyStr(GetElementValue(LineElement, 'Description'), 1, MaxStrLen(Description));
            Evaluate(Quantity, GetElementValue(LineElement, 'Quantity'));
            Evaluate(UnitPrice, GetElementValue(LineElement, 'UnitPrice'));

            Message('Line %1: Item %2 (%3) - Qty %4 @ %5',
                LineNo, ItemNo, Description, Quantity, UnitPrice);
        end;
    end;

    local procedure GetElementValue(ParentElement: XmlElement; ChildName: Text) ReturnValue: Text
    var
        ChildNode: XmlNode;
    begin
        if ParentElement.SelectSingleNode(ChildName, ChildNode) then
            ReturnValue := ChildNode.AsXmlElement().InnerText();
    end;
}
Working with Attributes
Sometimes values live in attributes rather than child elements. For example, if <Header> had a currency attribute instead of a child element:
<Header currency="USD">
You’d read it using the Attributes() collection:
var
    AttrCollection: XmlAttributeCollection;
    CurrencyAttr: XmlAttribute;
    CurrencyValue: Text;
    i: Integer;
begin
    AttrCollection := HeaderElement.Attributes();
    for i := 1 to AttrCollection.Count do
        if AttrCollection.Get(i, CurrencyAttr) then
            if CurrencyAttr.Name() = 'currency' then begin
                CurrencyValue := CurrencyAttr.Value();
                break;
            end;
end;
Alternatively, you can use an XPath expression with SelectSingleNode() to target an attribute directly, which is often cleaner:
var
    AttrNode: XmlNode;
    CurrencyValue: Text;
begin
    if HeaderElement.SelectSingleNode('@currency', AttrNode) then
        CurrencyValue := AttrNode.AsXmlAttribute().Value();
end;
Handling Namespaces
If your XML uses namespaces (common with SOAP responses, e-invoicing standards like PEPPOL/UBL, and bank file formats like ISO 20022), you’ll need an XmlNamespaceManager. Here’s a quick example:
var
    XmlDoc: XmlDocument;
    NsMgr: XmlNamespaceManager;
    RootElement: XmlElement;
    ResultNode: XmlNode;
begin
    XmlDocument.ReadFrom(XmlText, XmlDoc);
    NsMgr.NameTable(XmlDoc.NameTable());
    NsMgr.AddNamespace('so', 'http://example.com/salesorder');

    XmlDoc.GetRoot(RootElement);
    RootElement.SelectSingleNode('so:Header', NsMgr, ResultNode);
end;
The namespace prefix you add to the manager ('so') doesn’t have to match the prefix in the XML—it just needs to map to the same URI.
Gotchas and Tips
- Always check the return value of
ReadFrom(). If the XML is malformed you’ll get false rather than a runtime error, which gives you a chance to log the problem and handle it gracefully.
SelectSingleNode() vs GetChildElements() vs SelectNodes(): Use SelectSingleNode() when you expect exactly one match by name. Use GetChildElements() when you expect zero or more children to iterate. Use SelectNodes() when you need XPath expressions that match multiple nodes at varying depths—it returns an XmlNodeList just like GetChildElements().XmlReadOptions: ReadFrom() has overloads that accept an XmlReadOptions parameter. If you need to preserve whitespace in the document (for example, when processing pre-formatted text content), set XmlReadOptions.PreserveWhitespace to true before calling ReadFrom().- Type conversions:
InnerText() always returns Text. Use Evaluate() to convert to Integer, Decimal, Date, etc. Watch out for locale-sensitive formats with dates and decimals—consider using XmlConvert or explicit format strings when parsing dates.
- Large documents: For very large XML files, consider processing nodes as you go rather than loading everything into variables. AL’s XML types handle the DOM in memory, so extremely large files can affect performance.
- Missing elements: Decide early whether a missing element is an error or just an empty value. The
GetElementValue helper above silently returns empty text—adjust this for your requirements.
Wrapping Up
Reading XML in AL follows a straightforward pattern: load the document with XmlDocument.ReadFrom(), grab the root with GetRoot(), and then navigate the tree using SelectSingleNode() and GetChildElements(). A small helper like GetElementValue keeps your code clean when you’re pulling lots of values. For multi-level structures like our sales header/lines example, it’s just a matter of nesting the same pattern—navigate to the parent, iterate the children.
If you haven’t already, check out my earlier post on creating an XML file in AL to see the other side of the coin.
Learn more:
Note: The code and information discussed in this article are for informational and demonstration purposes only. Always test in a sandbox first. This content was written referencing Microsoft Dynamics 365 Business Central 2025 Wave 2 online.


 available.