 Microsoft Dynamics 365 Business Central offers a multicurrency feature that allows users to work with different currencies. This feature lets users process payments and invoices in various currencies and adjust exchange rates. Multicurrency functionality enables businesses to operate globally, deal with international customers and suppliers, and accurately track financial transactions in different currencies. Users can set up new currencies, define exchange rates, process sales and purchases in foreign currencies, and even set up additional reporting currencies to view business results in different currencies.
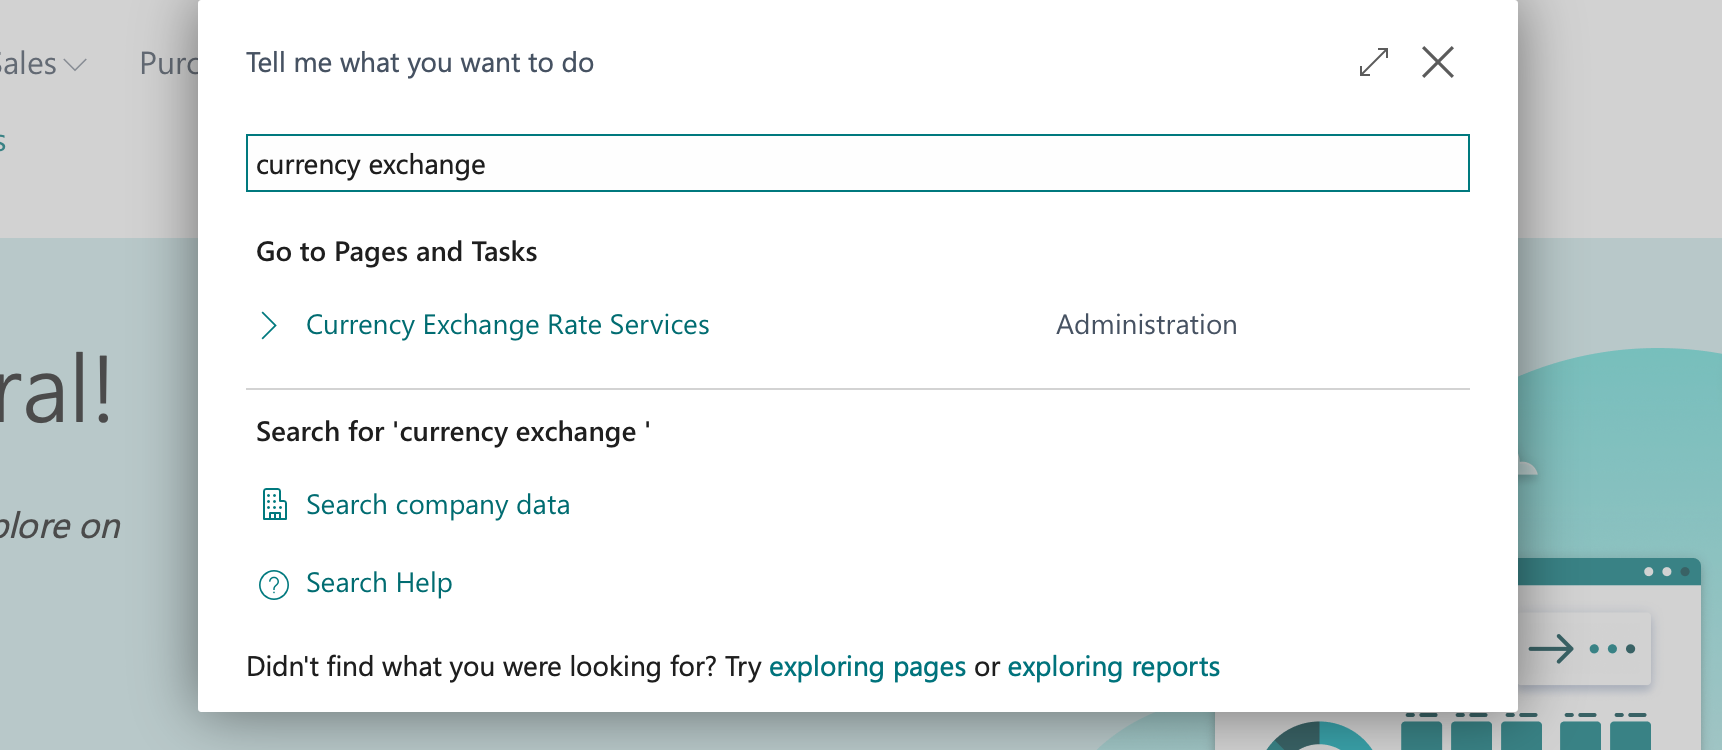
If you work with multiple currencies in your environment, you may have experienced the challenge of manually keeping your currency exchange rates up-to-date. Updating the rates becomes even more difficult if you have multiple companies in your environment. Did you know that built into Microsoft Dynamics 365 Business Central, there is a way to update these rates automatically?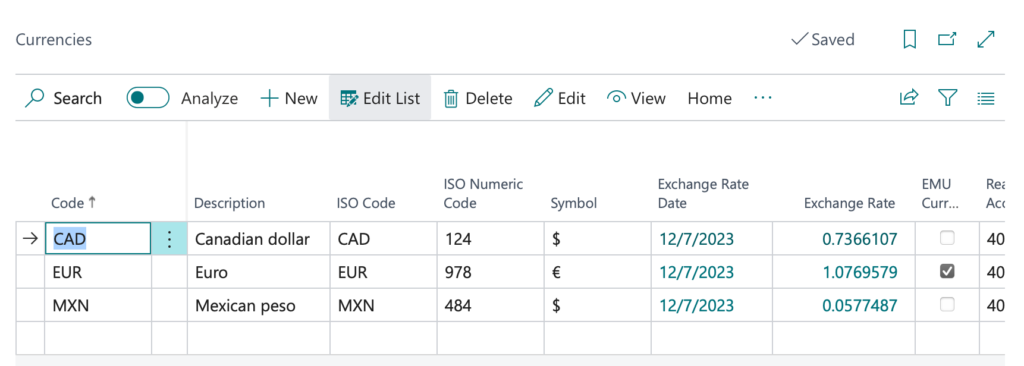
The Currency Exchange Rate Services functionality, part of Microsoft Dynamics 365 Business Central, allows you to fetch and update currency exchange rates from external services automatically. These services provide up-to-date exchange rates for different currencies, essential for businesses that trade in multiple currencies. By using Currency Exchange Rate Services, you can ensure that your currency exchange rates are accurate and reflect the current market conditions.
Business Central requires an exchange rate service that provides XML and JSON currency feeds. There are many services available; one of these services is FloatRates. FloatRates is a service that offers FREE XML and JSON Currency Feeds. (at the time of this writing)
To set up the FloatRates Currency Exchange Rate Service in Business Central, follow these steps:
- Search for Currency Exchange Rate Services using the Tell Me feature of Business Central.

- Open the Currency Exchange Rate Services Administration page.
- Select the New action to create a new service.
- Fill in the necessary fields on the Currency Exchange Rate Service page.
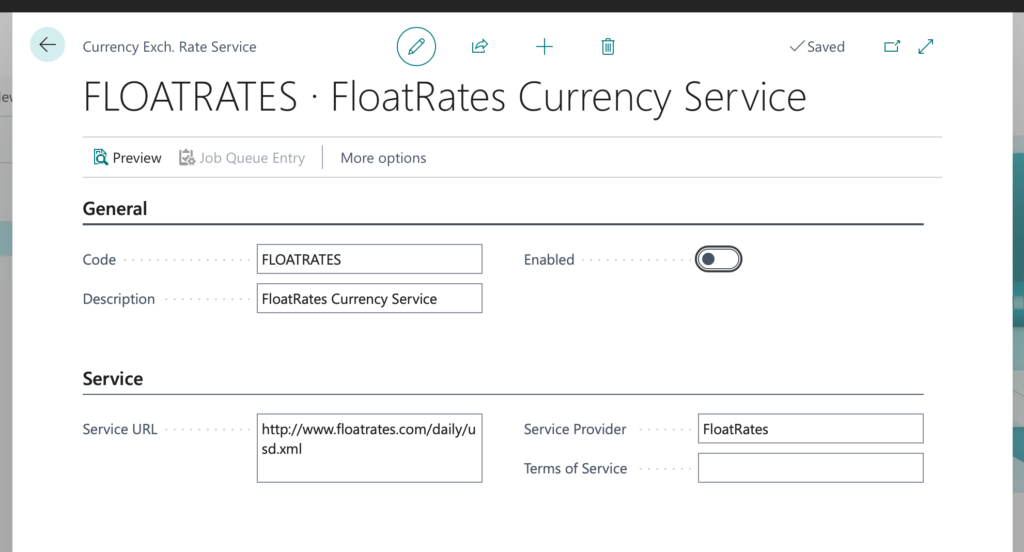
- Enter the URL for your base currency in the Service URL field. In this example, we’re using USD with a feed of http://www.floatrates.com/daily/usd.xml. You can find your currency feed here.
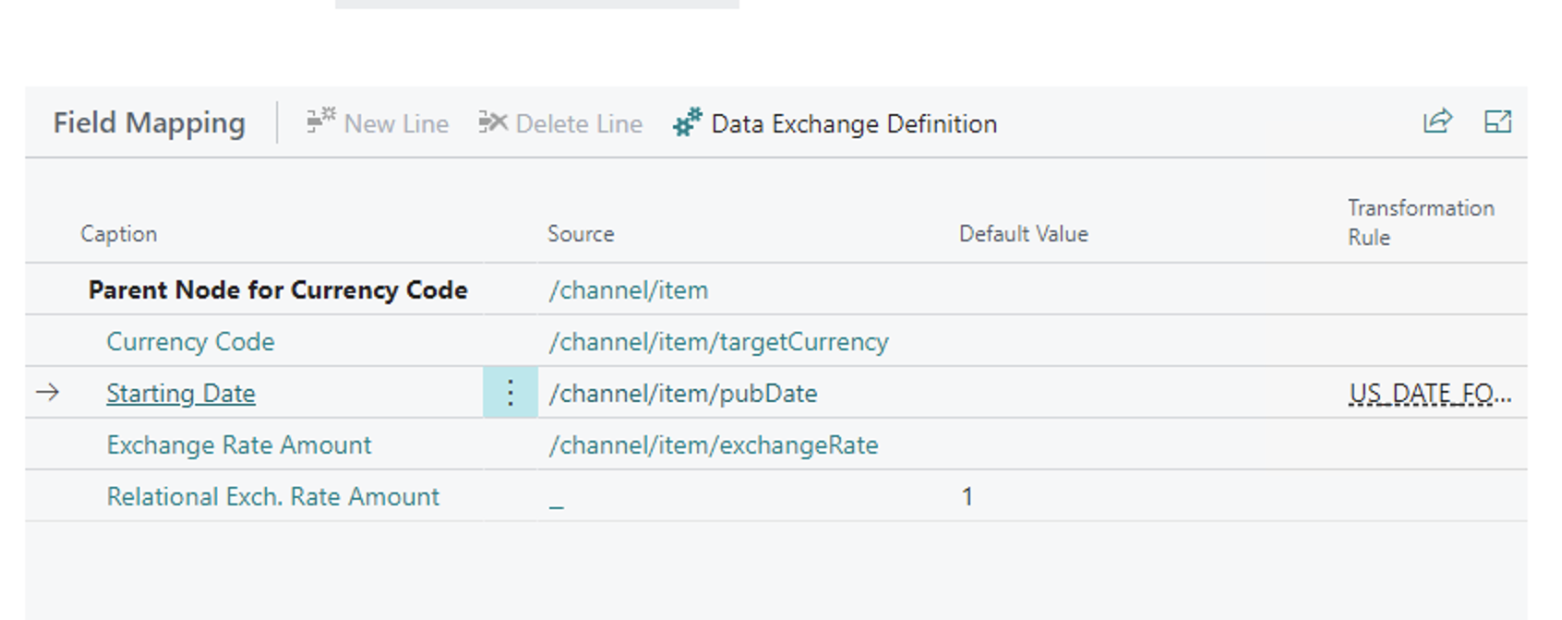
- Map the data elements from the data feed to the desired currency fields in the field Mapping area of the page. You can enter data transformation rules and default values if necessary.
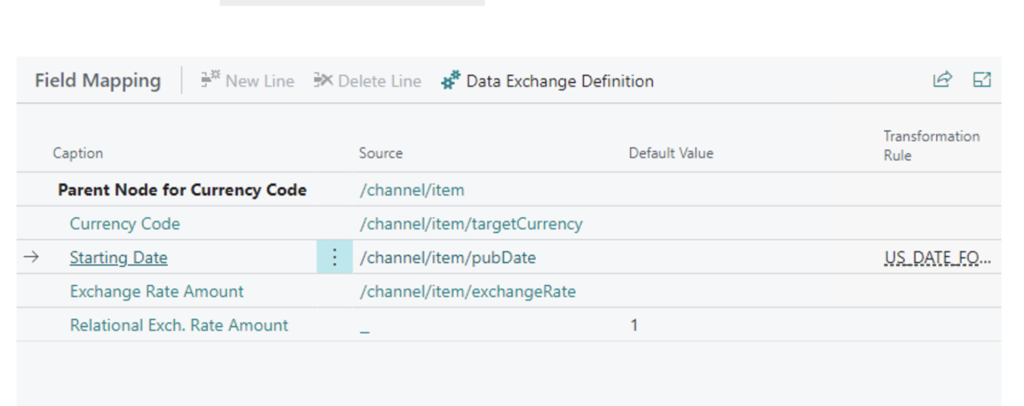
Note: For the data source field, you can type or select the values by clicking the ellipsis button.
Also note, at the time of this writing, I have experienced and heard of instances where the captions may not display correctly in Business Central 2023 Wave 2. The value mapping fields are still the same if you encounter this issue.

- After completing the field mapping, You can Preview the mapping by selecting the Preview page action.
- Enable the service by toggling the “Enabled” option.
Once you have set up the Currency Exchange Rate Service, you can use the “Update Exchange Rates” action on the Currencies page in Business Central to fetch the latest currency exchange rates from the service provider. You may also use a Job Queue to schedule the currency update to automate the process.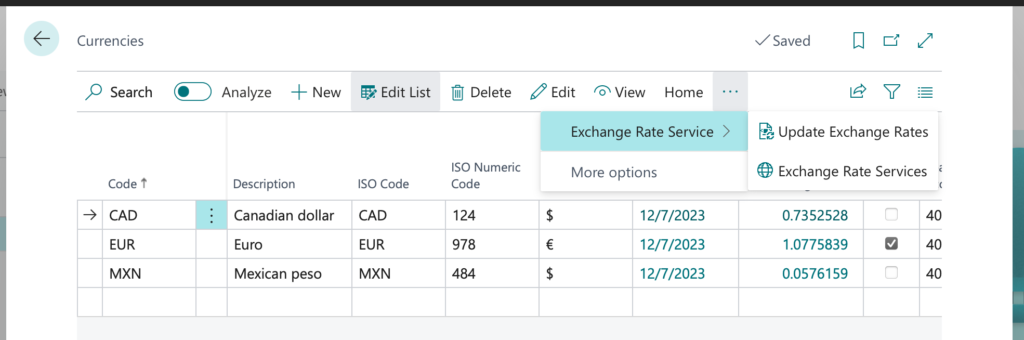
Note: The code and information discussed in this article are for informational and demonstration purposes only. This content was created referencing Microsoft Dynamics 365 Business Central 2023 Wave 2 online.

 available.