With each update of Dynamics 365 Business Central, Microsoft enhances what is often referred to as the base application and enhances the development environment. Dynamics 365 Business Central 2023 Wave 2 has several exciting Application features for runtime 12.0. One of the exciting features is to Dynamics 365 Business Central 2023 Wave 2 – Provide queries for users to do ad hoc data analysis.
 In the realm of AL development for Microsoft Dynamics 365 Business Central, Query objects are a pivotal tool for extracting and amalgamating records from multiple tables, thereby structuring the data into a unified dataset composed of rows and columns, akin to the functionality provided by an SQL query. There are two types of Query objects: ‘normal’ and ‘API’. Additionally, Queries can execute computational operations on the data, such as sums or averages within a specific dataset column. Moreover, the utilization of Query objects offers a notable enhancement in terms of performance efficiency, particularly in data reading and processing operations.
Before Microsoft Dynamics 365 Business Central 2023 Wave 2, if a developer wanted to display the results of a query on a page, they had to open the Query, loop through the records, and add them to a page with a temporary source.
page 50100 "DVLPR Customer Overview"
{
ApplicationArea = All;
Caption = 'Top Customer Overview';
DeleteAllowed = false;
InsertAllowed = false;
ModifyAllowed = false;
PageType = List;
SourceTable = "DVLPR Top Customer Overview";
SourceTableTemporary = true;
UsageCategory = Lists;
layout
{
area(content)
{
repeater(General)
{
field("No."; Rec."No.")
{
ToolTip = 'Specifies the value of the No. field.';
}
field(Name; Rec.Name)
{
ToolTip = 'Specifies the value of the Name field.';
}
field(City; Rec.City)
{
ToolTip = 'Specifies the value of the City field.';
}
field("Country/Region Code"; Rec."Country/Region Code")
{
ToolTip = 'Specifies the value of the Country/Region Code field.';
}
field("Country/Region Name"; Rec."Country/Region Name")
{
ToolTip = 'Specifies the value of the Country/Region Name field.';
}
field("Profit (LCY)"; Rec."Profit (LCY)")
{
ToolTip = 'Specifies the value of the Profit (LCY) field.';
}
field("Sales (LCY)"; Rec."Sales (LCY)")
{
ToolTip = 'Specifies the value of the Sales (LCY) field.';
}
field("Sales Person Name"; Rec."Sales Person Name")
{
ToolTip = 'Specifies the value of the Sales Person Name field.';
}
}
}
}
trigger OnOpenPage()
var
TopCustomerOverviewQuery: Query "DVLPR Top Customer Overview";
begin
TopCustomerOverviewQuery.Open();
while TopCustomerOverviewQuery.Read() do begin
Rec.Init();
Rec."No." := TopCustomerOverviewQuery.No;
Rec.Name := TopCustomerOverviewQuery.Name;
Rec.City := TopCustomerOverviewQuery.City;
Rec."Sales (LCY)" := TopCustomerOverviewQuery.Sales_LCY;
Rec."Profit (LCY)" := TopCustomerOverviewQuery.Profit_LCY;
Rec."Salesperson Code" := TopCustomerOverviewQuery.Salesperson_Code;
Rec."Sales Person Name" := TopCustomerOverviewQuery.SalesPersonName;
Rec.Insert;
end;
end;
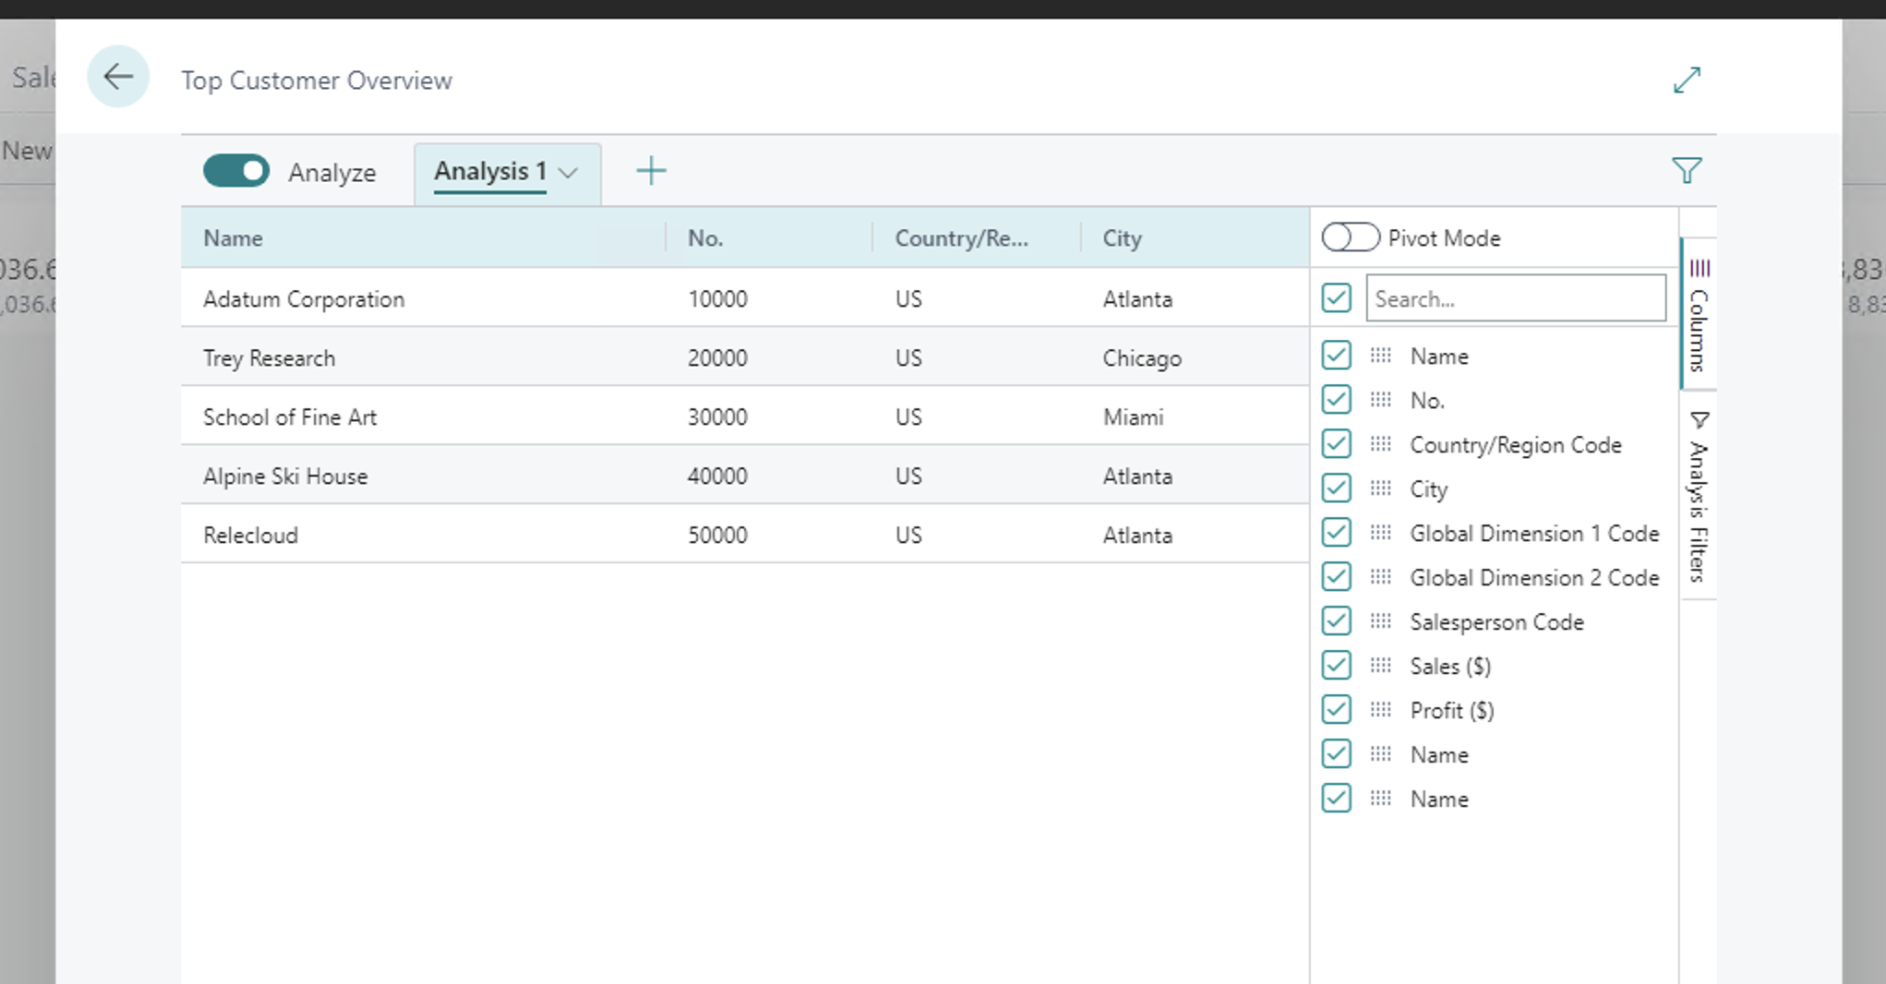
}Now – a developer can display the Query by running the object directly. Wait, there is a bonus – not only does the Query display, but it is in the new Analysis Mode.
pageextension 50100 "DVLPR Customer List Ext" extends "Customer List"
{
    actions
    {
        addlast("&Customer")
        {
            action("DVLPR Top Customers Query")
            {
                ApplicationArea = All;
                Caption = 'Top Customers Query';
                Image = Sales;
                RunObject = query "DVLPR Top Customer Overview";
                Tooltip = 'Open the top customer query.';
            }
        }
    }
}
Read more about the feature Provide queries for users to do ad hoc data analysis across tables here.
Note: The code and information discussed in this article are for informational and demonstration purposes only. This content was created referencing Microsoft Dynamics 365 Business Central 2023 Wave 2 online.
 available.